Bright & Beautiful in Blue

Well, I am SO excited to have finally found a perfect location to begin holding local card classes! It's been what seems like an eternity since moving away from my former home where I held monthly classes for up to 8 at a time for years and years. And by contrast my new home is hardly big enough for ME to stamp solo!  So this search for the "perfect" place to hold classes again has taken me a mighty long time. (Believe me, I had a LONG list of requirements as to what I was looking for…… yes, with THIS many years' experience I kinda had those things figured out.)

P9030144So it was with a mixture of extreme excitement (and yes, a little nervousness) that I launched my new monthly card class series just one week ago today – right here in Post Falls.  And I look forward to working with the lovely ladies I met and getting to know them (and their friends) more in the future. Hurray! I'm back in the saddle – but with the new twist that card class will now always be "pack-it-up-and-take-it-with-me" style.

We'll be doing 6 full-size cards every month: 2 each of 3 different designs. I've added a couple of other fun tweaks, too, but won't go into that here 'cuz I haven't even had a chance to share 'em with the ladies at class.  But I did want to share the 3 designs my guests made last week, so I'll bring you this first one today and share the other two later on. 

As I was starting to consider what I would design for this first class I met a lady who seemed really excited about joining us and learning to stamp, and she came right out and asked me if we could please do a Christmas Card. Well of course I told her sure thing….. and then as it turned out she never signed up for class.  Oh well, I hope the others enjoyed "her" card anyway!  🙂

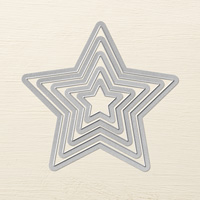
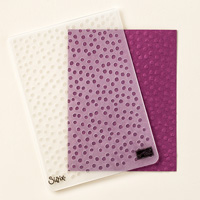
This features the "Bright & Beautiful" stamp set from the Holiday Catalog, along with the Stars Framelit set in the 2014-2015 Annual Catalog. The upper part of the front is embossed with the Decorative Dots Embossing Folder, and the lower section features a couple of pieces from the "All is Calm" Specialty Designer Series Paper collection. (May I just mention here how much I adore that DSP collection?!?)

I'll be sending a complete review of how we created this card (supplies & step-by-step instructions) to the ladies who attended this class, as well as to my Paper Dreamers team.  If you'd like the instructions for how to make my future monthly Card Class designs  – come join us at class, host a class for your own friends (yes, we might even be able to swing a distance class; just ask), or join my Paper Dreamers team!

Product List

Age Awareness Meets the Big Shot

P8250078I recently needed a birthday card for a guy whose personality kinda leaves room for something a little different, if you know what I mean. So I immediately reached for that fun new "Age Awareness" stamp set. And as long as I was rooting around in the "A" part of my stamp collection anyway, I grabbed the new "Amazing Birthday" set, too.  Later on I realized the "Celebrate" from the upcoming "Holiday Invitation" stamp set would be perfect as well, and added that to the pile.  Then I gathered up some "guy" colors (browns and bronze mostly, from a retired DSP set whose name escapes me) and cooked up this little number.  And then I signed & sealed it – and mailed it off.

And then I was sad.

Because not only had I not made a copy for myself to keep, but I'd even forgotten to take a picture!

So I made another similar one – in a different color scheme.

But although it looked fine, it just wasn't the same. So I made another in the SAME color scheme.

There. That's better. And then I took pictures of both so I could share.P8250077

Both the card fronts and their coodinating insides gave my Big Shot a workout, which was fun because it's been a bit of a while since I've had a play date with my Big Shot! I used 2 sets of Framelits and the 1-1/4" circle punch….. blended it all together and this is what came out.  I think this would work well in just about ANY monochromatic color combo, don't you?

P8250080Oh! And speaking of the Big Shot, there's a special going on right now (through Aug. 31)  that offers you your choice of one of 5 FREE exclusive Stamp Set/Framelits bundles with the purchase of a Big Shot, OR….. if  you already have your Big Shot you can get one of the exclusive bundles for 15% off the price of buying the stamp set and Framelits set separately. Be aware these bundles are exclusive to this offer, so they're available for a limited time only (Aug. 31, 2014); and they're NOT the same bundles found elsewhere in the catalogs!

Pssst! One of these bundles even features a fab new stamp set that technically won't be available otherwise until the Holiday Catalog goes live!

Check out these special limited-edition bundles here, and see the specific stamps sets and major tools I used on these cards in the list below.

Product List

Card-making classes coming to Post Falls, ID!

Facebook images cust size-011
I'm so excited to finally be able to announce the Grand Opening of my monthly card-making classes in Post Falls – next Thursday, August 28th! We'll enjoy a lovely easy-to-access location with plenty of work space and parking, along with the creature comforts I've insisted on, and rent that won't force your class fees through the roof! Hurray!

So if you're in the greater Spokane, Post Falls, CDA area and don't already have a Stampin' Up! demonstrator with whom you work, I hope you'll come celebrate with us at my Grand Opening!  Come "make & take" 6 pretty cards with coordinating envelopes – at your choice of 3 class sessions that day.

Oh! And did I mention that all 3 sessions of these classes on Grand Opening Day on complimentary?!?  Yep, you read that right….. your class is "on me"!

So grab some friends and come enjoy a couple hours of creativity and fun!

Details and sign-up info are at: http://bit.ly/Class-Signup

Oh, and I'm also going to be holding a Crafter's Garage Sale in Post Falls – today and tomorrow (Fri/Sat – Aug. 22 & 23). Location, times and other stuff: http://spokane.craigslist.org/gms/4630314608.html

Come see what stamps, inks, embellishments, dies and other tools & treasures might enhance YOUR Paper Dreaming adventures!

Hooked on Project Life by Stampin’ Up!

Ok, I admit it. I'm hooked.

I don't think I'm destined to ever become a prolific page-maker, but I have to admit I've accomplished more pages since Stampin' Up!® partnered up with Project Life® a few months ago than I'd done in the past half-dozen years or so! I love that the system is straightforward and simple, but that you can work at any level of design that you wish. In other words, while you can follow the totally simple, plain vanilla version of creating a layout (just slipping photos and cards into pockets), there's still room for as much or as little personalization and creativity as you may feel inspired to include.

IMG_20140805_134311
This layout's got a little more "creativity" factor goin' on, beginning with messing around with the photos in Photoshop Elements. (At which I'm all thumbs, btw, so the process took way more time than it should have.  But once I get my teeth into an idea my "stubborn" gene tends to take over, and well…..)  Anyway, the close-up of the chalk and the B&W background on the family picture are examples of that Photoshop Elements stubbornness. But once the pix were printed, sliding 'em into the photo pockets took all of a minute or two….. so a reasonable trade-off, I figure.

IMG_20140805_135851 copyI chose cards from the "Everyday Adventure" collection (you might count 4 of 'em used – the 3 with journaling, plus the one with the 2 interlocking circles). Then I turned to what Stampin' Up! is known for: color coordination.  I checked the catalog to see exactly which colors were used in the Everyday Adventure card collection, decided which of them I'd like most to feature (based on the colors in my pictures), and cut 3" x 4" pieces of Designer Series Paper in those same colors to fill in the remaining 2 openings. LOVED THAT!

IMG_20140805_140514 copyThen I headed over to my computer, fired up MDS and worked a little digital design magic for the "SAFE" and "BASEBALL game" phrases. (I already had the software and "Game Day Baseball" stamp brush set [digital downloads] on my computer, so I didn't need to purchase anything new for this.) I suppose you could call the results "embellishments", but they're actually just images printed onto Whisper White cardstock and cut out. Not really magic at all.  But how awesome is it to be able to work with those same colors all the way through the process – and end up with a finished project that totally coordinates?!? I've grown so spoiled with having all these "coordinating" options over the years that I can't imagine trying to create a complete project (of ANY kind, actually) without Stampin' Up! at my fingertips.

Ready to give this super-easy form of memory keeping a try? In addition to a couple of scraps of retired Designer Series Paper, here are the rest of the products I used in this layout. The first 3 were the basics (only $27.85 combined!), and I used the last 3 for the custom artwork.

Product List


Struggling with sympathy cards

IMG_20140731_091044

Why does it seem that the need for sympathy cards comes in batches? I arrived home just over a week ago from my Convention trip to the news that I was in need of several such cards.  But exhausted from my 10-day trip and the extreme heat here, along with battling a summer cold to go along with it (I'll never understand how you can be sweating and freezing at the same time), I was completely void of any creative inspiration.  I knew I wanted something appropriately simple and sweet (I hate mushy), but I was at a loss for ideas.  

Luckily, at just the right moment my eye fell on one of our Convention Make and Take projects, and I realized that with a few adaptations, it would fit the bill perfectly.  So here's one of several similar cards I cranked out. 

Kinda EclecticThis features one of the stamp sets we received at Convention: Kinda Eclectic.  I had fallen instantly in love with that set the moment I spied it back when the catalog was brand-new, and was delighted to learn it would be featured at Convention.  It's another one of those "artistic expression" stamp sets that belong on every stamper's shelf because the images can go with and enhance just about everything!

Watch for more details about this card in my upcoming newletter.  If you're not already a subscriber you might wanna be!

Something for Baby

Ta Da!!! My swap cards for Stampin' Up!® Convention 2014 are finally done!!!

And I figured I might as well share the design here so you too, can experience the enormous sigh of relief, lol.  The design's actually been through several iterations over the past month or so that I've been working on it, and here's what I ultimately ended up with:


P7120068 w watermark

I think this concept would be adorable to build an entire baby shower theme around. Just imagine the coordinating invitations, banners and other decorations, cupcake toppers and yes, even goodie bags – all with the same images and yummy colors!

This card features the "Something for Baby" bundle (stamp set + Framelits dies) shown on page 74 of the 2014-2015 Annual Catalog, and the colors are Strawberry Slush, Coastal Cabana & So Saffron.  (With a touch of Crisp Cantaloupe added by way of the thick twine.)

Download the supplies list and step-by-step instructions for making this card here: Download Convention Swap 2014 – Something for Baby

And I'm now off to go pack up my cards and HOPE I remember to take them with me when I leave!

Birthdays are Like Hairballs

P7060065

I'm not generally a "gag card" kind of gal, but something about the Giggle Greetings stamp set just called out to me last year and I HAD to have it. So my set's actually been hanging around unused now for a number of months, but I finally had an occasion to pull it out recently and put it to work. 

I needed a card for a guy, so I chose Basic Gray as my main color.  Then added a little bit of Crisp Cantaloupe for pop.  I applied little bits of color with a blender pen, picking up color from inside the lid of the ink pad.  (After squeezing the pad before opening it, that is.)

I'm still working with the DSP from the Neutrals collection of a couple years' ago, but the current Neutrals collection would work just as well, of course. The patterns have changed though, so stripes aren't available anymore.

And because I have a gigantic pile of scraps from last year's Glimmer Paper, I chose that for the punched stars.  But I think the new Dazzling Diamonds Glimmer Paper would work just as well.

And the inside of the card holds a little surprise. (Crisp Cantaloupe Thick Bakers Twine, pulled apart and wadded into a ball, then glued down with Tombow Liquid Glue.)  The card recipient (a cat daddy) laughed and said he hadn't had to deal with that since the day before!

Product List
“Stamp Set of the Month” Class


Stamp-Set-of-the-Month-Work

“Stamp Set of the Month” Classes


Don’t miss these fun monthly classes – whether you participate as part of an informal gathering of friends, or at a hosted open class in your local area, or all by yourself in your jammies right in the comfort of your own home. These classes will feature one stamp set each month (a comfortable way to grow your stamp collection), and are designed for flexibility – to fit the way YOU like to stamp!

Your class kit will include:

  • All your paper goods to make the monthly projects (already cut to size)
  • Envelopes for each card you’ll make
  • Trimmings & embellishments

You’ll also get (in PDF format):

  • Close-up color photos of finished examples
  • Complete, easy-to-read supply lists
  • Paper and ribbon cutting sizes (should you wish to recreate the projects later)
  • Clear step-by-step instructions

You’ll also need:

  • The monthly featured stamp set
  • Acrylic blocks (if you choose “clear-mount” stamps)
  • Ink pads (colors will vary by project)
  • Papercrafting tools such as punches, simply scored scoring tool, envelope punch board, Big Shot & dies, etc. (Usually only 1 or 2 items per class, however, because I will prep as many elements for you as possible in advance.)
  • Basic papercrafting supplies such as scissors, bone folder, adhesives, etc.

ALL of these supplies are available through Stampin’ Up!®, at my online store.

If you don’t already have all the ink colors featured in the monthly projects, you may either substitute colors you DO have, or (better yet) arrange with some friends to each order a couple of the featured colors and then schedule a time to work on your projects together where you can share the ink pads.

Getting your own “Stamp Set of the Month” class kit is as easy as 1 – 2 – 3.

  1. Place a product order of $40 or more at my online store using the monthly code I will provide. Your products will ship direct from Stampin’ Up! to you. (If anything is backordered, it will ship as soon as it becomes available.)  
  2. Email me immediately after placing your qualifying order and request an invoice to purchase your class kit. (Email address is at top of page.)
  3. Pay the invoice you will receive via email ($6.00) before the availability of the monthly class expires, and then keep an eye on both your snail mail (for your project kit), and your email (for your PDF instructions).  

A few more things you might want to know:

  • Free class kit, free products:  While the minimum qualifying order to get a project kit is $40, of course I welcome orders greater than $40, too. In fact, if your order happens to be $75 or more, you’ll get your “Stamp Set of the Month” card class from me for FREE. And if you order reaches $150, you also qualify for the extra “Stampin’ Rewards” that Stampin’ Up! offers. ($25 or more of free merchandise.) 
  • Sometimes a little hand-holding doesn’t hurt:  If the thought of ordering product online makes you break out in a cold sweat, no worries. Just call me on the phone with your credit or debit card number handy (my number’s at the top of page), and I’ll submit your product order on your behalf. It will still usually ship directly to your home.
  • Make it a regular thing:  Participate 3 months in a row and get up to $10 bonus product of your choice with your 3rd sequential “Stamp Set of the Month” class kit.  I will contact you to find out what product(s) you’d like.
  • Two’s company, and three’s a crow….. er, three’s even MORE (fun) company!  Looking for a local group to do your “Stamp Set of the Month” classes with? Shoot me an email and I’ll see if I can get you matched up!
  • Just in case you’ve ever thought about joining us as a Stampin’ Up! demonstrator, these class resources are a complimentary perk of joining my Paper Dreamers Team! Let’s talk!


Work of Art – A “must-have” for every stamper’s collection

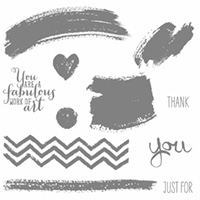
So I'm really enjoyin' working with Stampin' Up!'s new stamp set "Work of Art".

134114G

Its bold paint-swatch and handprinted images get color down on your paper quickly, and work equally well as either a whisper-quiet background allowing another image to step up center-stage on top of it, or they can grab the entire spotlight themselves and shout "Look at ME!"

In either case you'll find a versatile stamp set worthy of joining any stamper's collection…… right next to that other favorite staple of mine "Gorgeous Grunge".    

Gorgeous Grunge

Here are a couple cards I knocked out last evening after inking up some of the stamps in "Work of Art". I loved how fast these cards went together, and I'll bet you will too. Watch for details about a class I'll be offering soon based entirely on this stamp set. 

Work_of_Art_Thank_you_1

Work_of_Art_Thank_you

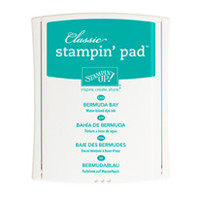
The colors I chose for these cards are So Saffron, Crisp Cantaloupe, Strawberry Slush and Bermuda Bay.  Aren't they just delish?!?

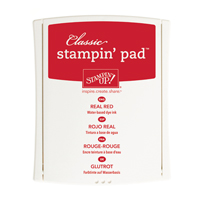
And as we approach Independence Day, what better way to celebrate the Red, White and Blue?  (Real Red and Pacific Point, to be specific.)  Now, because I was working with a wood-mount set, this one was certainly an exercise in Stamp-a-ma-jigging, but I was pleased to see that the notecard size worked out perfectly!

Work-of-Art-flag

So what other creative ways have *you* found to showcase "Work of Art"?


Product List
Tips for navigating my Stampin’ Up! online store

Have you ever had the thought that things seemed a little bit awkward while navigating my online store? Maybe even a little tedious? Well in today's video I share some shortcuts to cut through all that, and help you get "in" and "out" and "done" faster!

Also, today is Day 1 of this week's "Weekly Deals", and if you own a Big Shot, I suspect there's something on that list you just might be needing. If you make cards or gifts, or scrapbook, teach school or Sunday School, have kids who have to do science projects (or any other projects) for school, or you're ever in charge of creating any other types of visual displays, see if you catch this "yep, definitely need THAT" product in this video…..
 

And don't forget there are more than 100 other items on the retiring list that are marked down, too – some by as much as 50%!  Watch the video first to pick up my shopping navigation tips, then see the entire retiring collection here. Just one week left to choose your favorites!

Oh btw, if you're reading this from a subscribed feed that doesn't show the video, click here to visit my blog directly, where you *should* be able to see it.