Year End Clearance – up to 80% off

Flyer_2014_year_end_clearance
Wow! You must have been "very good", because just in time for Christmas, Stampin' Up! has dropped another little gift into your stocking! 80% off of select retired products, including a number of favorites from Christmases past and present! Check it out and see if there's something here you may have missed. At first glance through, I immediately spotted 3 items that people have asked me about recently! But as usual, supplies are limited to what's on hand, so better shop early for best selection.

Preferred Customer Club: Please grab the current ordering code (tab at top of page) before heading off to shop. Thanks!

PS: You can click the image to see it larger. It's easier to read the fine print that way. Oh, and some of the missing fine print includes: Limited supplies (we already talked about that), all closeout sales are final, and you're welcome to include regular (current) products on your order, too!


Lynda’s Black Friday celebration

IMG_20141128_142939
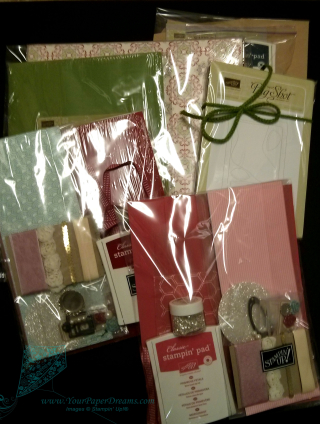
Overnight last night, I sent out to my mailing list (newsletter.YourPaperDreams.com) a special bit of fun I've got in store for Black Friday…. for all my customers who've chosen $50 or more in product (through me, of course) during Stampin' Up!'s Online Extravaganza this week. I've made up 10 Grab Bags (min $10 in value, but most are much more), and I've numbered them 1 – 10. At the end of today (Black Friday), I will assign them to the people who've placed the first cumulative orders of $50 or more from me so far this week! (Beginning Monday, Nov. 24.) And actually, you qualify for a gift with EVERY $50 you've ordered (CUMULATIVELY)….. until my 10 Grab bags are gone. 

This offer will run until midnight (MT) tonight (11-28-2014)….. unless all 10 Grab bags get claimed first! So if you'd like to participate, there's still time!

Just a fun little extra way to say THANK YOU for supporting my business.  🙂

And the race is ON!

Papercrafters Extravaganza 2014 copy
The race for the DISCOUNTS, that is!

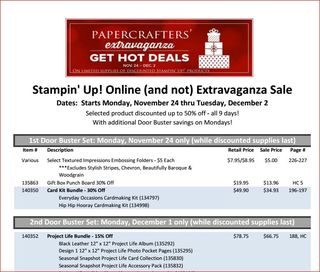
Stampin' Up!'s super sales Extravaganza combining Black Friday, Small Business Saturday and Cyber Monday into one 9-day stretch of product discounts, is off and running. It launched last night at midnight with the first of two "Door Buster" Mondays….. deals on specific products that will be available at special pricing for those days only.

But that's not all!

During the entire 9-day run (Nov. 24 – Dec. 2) you'll find discounts from 20% to 50% on a whole bunch of other products…… but only while supplies last.

Extravaganza 2014
Click the picture to view and download the rest of the list. And then grab YOUR share of the savings early. Before they're all gone.

As usual when shopping online with me, if your product order comes to $150 or more you'll qualify for Stampin' Rewards (pretty much the same concept as Host Benefits).The ordering system will guide you through selecting your free merchandise if you qualify.

But if your product total will be less than $150, please use the ordering code you'll find here. (You can insert and apply the code when reviewing your cart contents, BEFORE moving on to the checkout process.)

Oh! And if you're not already a member of my Paper Dreamers Preferred Customer Club, see what it's all about – HERE.

Many Merry Stars Kit – My favorite Stampin’ Up! Kit to date!

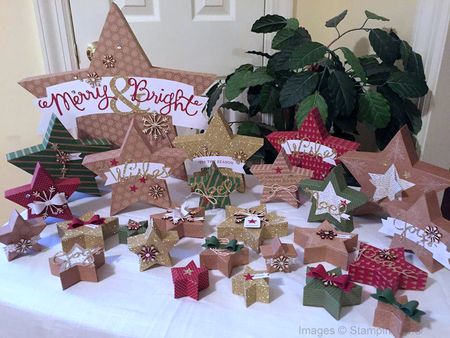
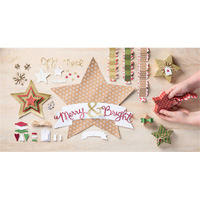
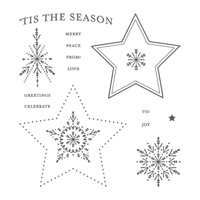
Well, I think the title of this post just about covers it. I love, love, LOVE Stampin' Up!'s Many Merry Stars Kit! So festive and sparkly…. if I wasn't already freaking out about how quickly this whole holiday season is bearing down (and directing my attention in other hectic directions) I think I'd probably already have a pretty display of these stars set up. Somewhere around here, lol. (Although I have no mantle upon which to display them, no furniture surfaces, and no place for a wreath or banner, either.)

IMG_20141025_105902 copy

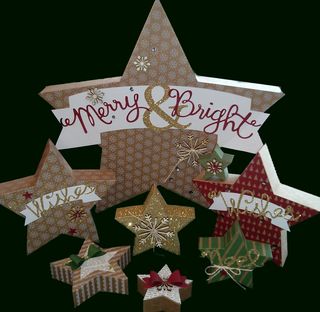
Instead, I've been toting my stars out to booths and classes to show 'em off, and I'm finding that YOU really like 'em too! This kit includes the suppplies (and embellishments) to create *26* 3-dimensional stars! (This picture only shows a sampling of 8 of 'em.)

Now if YOU had this Many Merry Stars Kit, here are some of the things YOU might do with your stars once you've got 'em assembled:

  • Tuck them into a garland of greenery with tiny white lights for your mantle. Rockin' Romance!
  • Group them into sets of 3 or 5 and set them around your house to carry the theme from room to room. Simple & sweet elegance!
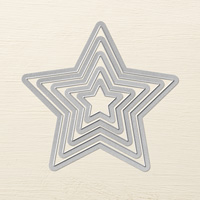
  • Hang the tiniest ones on your tree, and maybe even use a star die from the coordinating Stars Framelits Dies to add a sweet picture to commemorate a special memory from the year. Definitely "Awwwww…"-worthy!
  • Carefully cut and construct a pivoting "trap door" on the star shape that will ultimately become the back-side of the finished box (again with your coordinating Stars Framelits Dies,a piece of coordinating cardstock and a brad), so you can insert some tiny treats. Genius!
  • Stack coordinating stars of graduated sizes to make groupings for your holiday centerpiece. Simple & sweet eye-candy!
  • Suspend several from a banner. Stunning!
  • Using your Stars Framelits dies, cut a hole in the front of some smallish stars and insert a larger "window sheet" star shape on the inside. Put something pretty inside (before final assembly), or insert small white lights so they hang like a banner and glow from within. (Be very careful about potential overheating when putting lights inside paper boxes, of course. I don't recommend leaving them unattended or letting them remain lit for very long.) Creative!
  • Glue completed stars onto a sturdy, flat wreath shape. Stack them in a pleasing arrangement to completely cover the frame (smaller stars on top of larger), and glue them together where they overlap. Hang on a prominent door or wall (out of the weather). Absolutely breath-taking!

Many Merry Messages copy
Your kit will come with all the basics to make your 26 stars, although I recommend you also have a bone folder handy, as well as the Tombow Multipurpose Liquid Glue. Gather all your "stuff", and find a place to work where you can spread out a bit.

Here are a few tips I discovered while assembling my stars……

  • I highly encourage reading ALL the instructions included with your kit before beginning assembly. I know, that sounds boring and all, but there really are some helpful tips in there, and you probably don't want to ruin any of your stars by doing the trial-and-error method.
  • One of the tips you'll read about in the instructions is to start by assembling some medium-sized stars before moving on to the large or teeny-weeny ones. I totally agree that that's a good plan.
  • Punch out and group all the supplies for each star together. This will ensure you match and attach the right tops & bottoms with the right side pieces.
  • If you will be stamping images on any of yours, do it now. (Oh yeah, you'll probably want an ink pad and whatever stamps you choose for that.  I'll offer some additional product suggestions at the end of this.) Make sure the ink is totally dry before beginning assembly.
  • Take your time when assembling your stars, so you match the corners and points as precisely as you can. The kit pieces are all die-cut and scored accurately, but it's up to you to match up the points and corners.
  • Each side piece already has an adhesive strip on it to attach to its matching star shape. be sure to remove ALL protective coverings at the star points – where the adhesive sections overlap each other. If you leave a protective covering on one surface and only remove the tab on the other piece, the areas where they overlap will certainly not stick! Also, once you've adhered two surfaces together, it's important to burnish those areas real well with a bone folder or similar tool. You won't be able to reach all areas, of course, but doing that everywhere you CAN reach is helpful.
  • Some people (including me) have found that over time (perhaps aided by changes in temperature and humidity) the included adhesive may lose some of its grip. That seems to be more likely to occur with the smaller stars because they have much smaller gripping surface to begin with.  So…. I found it helpful to add and extra layer of stick-insurance by applying small dots of Tombow Multipurpose Liquid Glue (on top of the native adhesive) as I assembled each star.
  • If, in spite of your best efforts, you discover a day or two (or a week) later that certain areas of the sides have begun separating from their adjacent star pieces, here's how to perform some quick "fix-it" surgery.  Take a long, skinny scrap of cardstock…. say, about 1/4" – 1/2" wide and 3" – 4" long. Put a small amount of that now-famous glue on one end and insert it into the offending gap. Squeeze the parts together as you pull the strip back out, and hold pressure on it for a minute or so until the glue grabs. Then place a rubber band around the area to hold it together while it finishes drying, and you shouldn't have any more problems there!
  • Use that same glue to adhere your embellishments, including the stickers. I found that the big words "Merry & Bright" were particularly susceptible to coming loose with changes in temperature & humidity. So were I doing it again, I would just add small dots of glue on the back side of the words as I was attaching it in the first place, rather than "repairing" sections of it over the course of a couple weeks as different areas came loose.

So if you pay a little bit extra attention to gluing parts together at assembly time you'll probably spend less in "repair" time later on.  Just a word of advice from someone who did it the other way around the first time, lol.  🙂

Here's a video that Stampin' Up! put together that is helpful viewing, too.  (If you're reading this from an email feed, you may have to come to my website – www.YourPaperDreams.com -to see the video.)


Coordinating products you might like

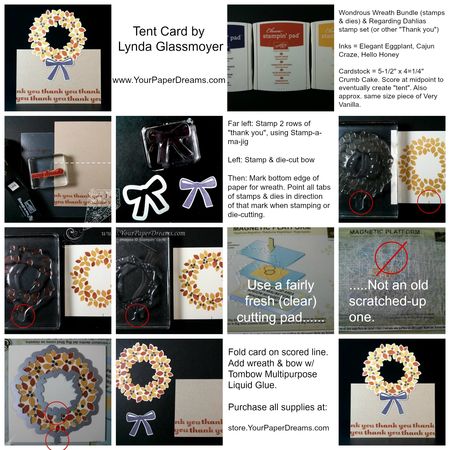
Wondrous Wreath Tent Card

Wondrous Wreath tent card
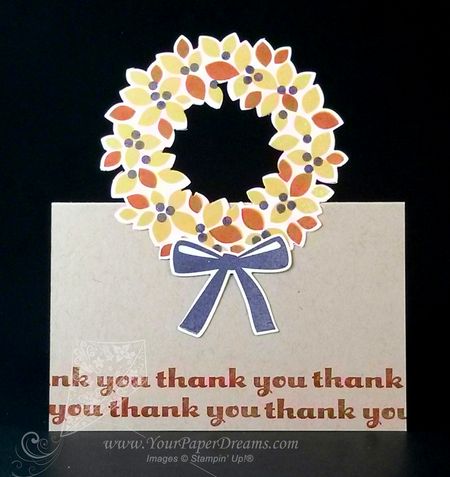
Today I've been making a pile of thank-you cards for recent customer orders, and thought I'd share the process with this One-Minute Tutorial. Click the picture to view it larger.

Tent card - Wreath Thank-You
And keep an eye out for some soon-to-be-announced Black Friday fun! If you're not already subscribed to my newsletter list, you might want to be…….!


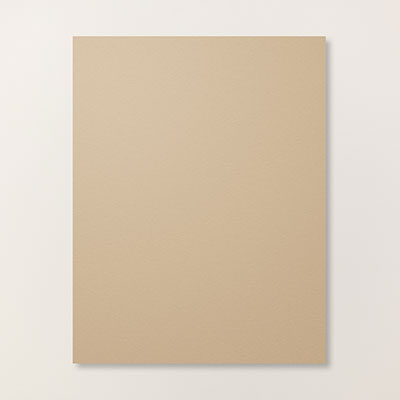
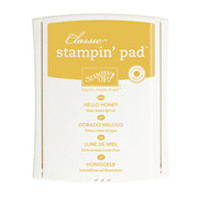
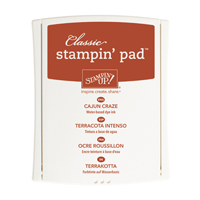
Products I used for this card

Directions to our Coeur d’Alene Monthly Card Class location

I’m so pleased that you’ll be joining us for our upcoming card-making class. Now I’ll bet you want to know how to FIND us!

We are currently meeting at the Lutheran Church of the Master in Coeur d’Alene, ID. It is on the northeast corner of Ramsey and Kathleen.  There are several buildings on the campus; we’ll be in the main building – in Schmidt Hall.  Schmidt Hall has its own door to the parking lot; please use that one to enter the building, rather than using the main doors near the Sanctuary and church offices.

Flashlight

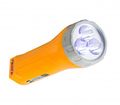
Please note: If you will be arriving or departing during hours of darkness, I encourage you to bring a flashlight. It may be helpful navigating outside on potentially uneven, wet or sloping ground. Just an idea for your safety.

Driving directions: Most convenient entrance to the church parking lot is the very first right-hand driveway north of the Ramsey/Kathleen intersection. Super-easy, if headed north. But…

… if you’ll be arriving from parts farther north,  local traffic and turn lanes and such can be a little more challenging. So I encourage you to either come south on Atlas and turn left onto Kathleen, then left onto Ramsey (and then immediately right into the parking lot), OR come south on 95, and then right onto Kathleen, then right again onto Ramsey (and then immediately right into the parking lot). 

You may notice a driveway the enters directly off of Kathleen, but that driveway is often closed during school hours. So it’s probably just safest to plan to follow the driving directions above.

See you soon!

Image courtesy of John Kasawa at FreeDigitalPhotos.net


3D Holiday Cheer Tag

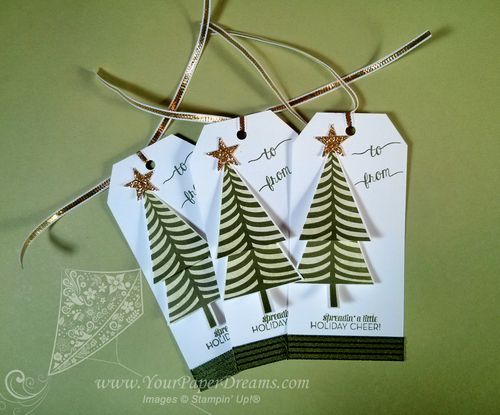
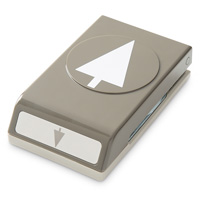
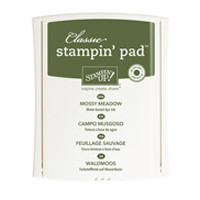
These fun 3-dimensional tags will be going out shortly as thank-you's for recent orders placed through me. The tags feature the Festival of Trees bundle (stamps + punch), along with another photopolymer stamp set called "Christmas Tagables". Colors are Pear Pizzaz and Mossy Meadow. And gold, of course; can't forget the sparkle!

IMG_20141030_134723

The base tag measures 4-1/4 x 2", and the top is punched with the Angled Tag Topper. (You can get 10 such tag bases from a single sheet of 8-1/2" x 11" Whisper White cardstock.)

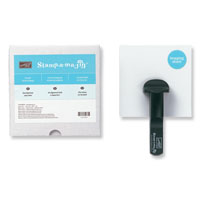
I did end up using my Stamp-a-ma-jig when stamping the 2-step parts of the tree image….. mostly because I was doing a big pile of these assembly-line-fashion, and it was just faster than eye-balling every one. I stamped the solid part of each tree with 2nd-generation Pear Pizzaz ink, and then stamped over that with Mossy Meadow.

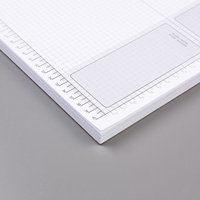
Each tag uses 2 identically-stamped tree images; both punched out with the coordinating Tree Punch. One of the images is then trimmed shorter: at 1/4" above the top of the trunk. (Have I mentioned lately how much I love my grid paper?) I just flipped the tree face-down on the grid paper and marked where the 1/4" point was (that's 1 square) on both left and right sides; then cut across with scissors. Then I gently curved the lower part of each tree forward with my bone folder.

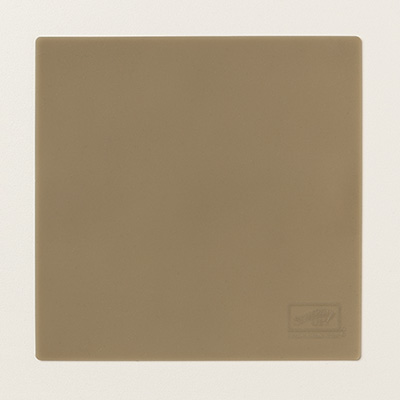
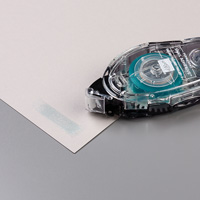
After applying the ribbon at the bottom (tip: using the Silicone Craft Map underneath allows you to apply SNAIL all the way to the edge of the tag without making any mess!), and after stamping the Holiday Cheer sentiment above that, I started building the "tree".

First, I anchored the full-tree piece as far left and low as reasonable, putting a glue dot under the tip at the top, and a Stampin' Dimensional a quarter-inch or so up from the bottom…… keeping the entire tree trunk parallel to the left edge of the tag. Then I mounted the partial-tree image over that one, with it's bottom edge 3/4" (3 squares) higher than the lower edge of the full image. (Have I mentioned lately how much I love my grid paper?) I also made sure to align the center of that piece (the tree trunk) with the lower tree image, and kept it parallel to the left side of the tag. As before, there's a glue dot behind the top tip (on the back side), and a Stampin' Dimensional about 1/4" up from the bottom.

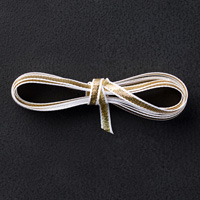
I think the rest of it is pretty easy to figure out from the picture, but another time-saver I used was to mount the "to" and "from" images on the same block (making sure they were straight, and parallel to each other).  I used an 8" length of Gold 1/8" Ribbon (double-knotted at the back) to finish it off.

Like most anything you create in multiples, I recommend using an assembly-line process to power through a pile of these if you'd like to make some. Each tag has a number of steps to completion, but each step goes fairly quickly.

Products Used

135859s

$16.95

130148s

$10.95

Hip Hip Hooray for World Card Making Day!

Over this past weekend my Paper Dreamers team members and I, along with our customers & friends, participated in World Card Making Day. And I'm thrilled to be able to share today that collectively we made 213 handmade cards! (That got reported to me, that is. It's entirely possible there were even more.) So a big thank you and congratulations to all who were included in that number!Facebook images cust size-013


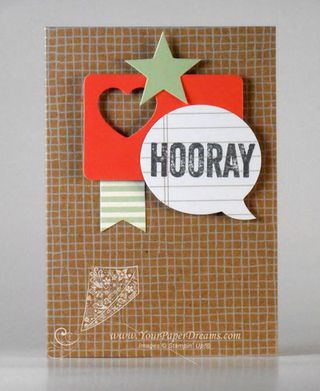
One of the sets of cards I personally worked on included several cards from the "Hip Hip Hooray" designer card kit by Stampin' Up!®. This was my first time exploring that kit and I was pretty impressed! In fact, this is probably one of my all-time *favorite* card kits. These cards are notesize cards, in a heavy-weight Kraft cardstock – printed with either dots or a graph pattern in white. Cards can be oriented in either vertical and horizontal format, and they all have coordinating Kraft envelopes. 3 clear-mount stamps (AND a basic clear block) are included in the kit, along with a Basic Gray ink spot (small ink pad), a full sheet of Stampin' Dimensionals, and several other embellishments. The main design elements come from 5 generous sheets of stampable "Peel & Stick" cardstock-weight stickers.

PA060199Overall, I found the kit pretty easy to put together….. but I figured it could be even EASIER with a few added tips. So here are some of mine:

  • Cards come flat, but prescored in the center. Once you've folded the card, crease it well with a bone folder.
  • Each card has a tiny "© Stampin' Up!" image printed on it. You'll probably want to locate that and make sure that that side becomes the back of your card.
  • Time saver tip: Stamp all the greetings at once – before you begin assembly, and before removing the stickers.Of course you can follow the examples precisely – or adapt according to your own needs. (More "thanks"; less "Hooray", etc.)
  • Use your grid paper to ensure the stamp is mounted straight on the block, and then when stamping, place the edge of the clear block exactly parallel to a straight line to ensure a straight stamped image. (See the crooked stamped image at left that reinforced in me the importance of that process….. oops, lol!)
  • If you wish to negate the self-adhesive effect of some of the elements that will be popped up on Stampin' Dimensionals, pat on some cornstarch with a cotton ball.
  • If you'd like to use just *part* of an image (for instance just "Hooray", but not the rest of the words on that stamp), you can apply blue painters tape to the part of the image you DON'T want to show. Then ink up your stamp, remove the painters tape from the stamp, and then stamp onto your paper.

I think the "Hip Hip Hooray" kit is already a generous value at $19.95, because it makes 20 cards and even includes stamps, ink & acrylic block you can use later. But throughout the remainder of today, you can get it for 25% LESS than that, as it's one of this past week's Weekly Deal items!

Stamp_Stock_Save_top copy
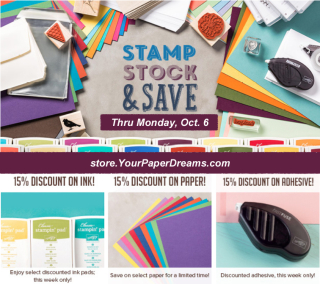
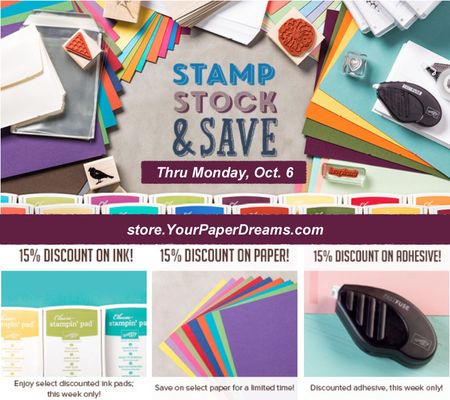
And speaking of "Deals", don't forget that today is the final day of Stampin' Up!'s "Stamp, Stock & Save" special offer, too.  If your craft room is in need of replenishing ink pads, cardstock or envelopes, there are only a few hours left to stock up on those basics and save!

The "Hip Hip Hooray" card kit comes with nearly everything you need to complete your 20 cards. But I found these following items helpful to use, too.

Lynda recommends

World Card Making Day

OK. So how in the WORLD did this happen?!? One minute World Card Making Day was "next month", and then next minute it's TOMORROW! I know I've been "spinning-in-circles busy" recently, but gooooood grief!

So anyway, now that it IS tomorrow, I guess I'd better get the invitation out for my WCMD "event", huh? Which will be virtual this year, since my stamping friends are several hundred miles apart and impossible to gather into one room.  :-)  So here's the scoop:

You're invited:

To join me for World Card Making Day, by scheduling time tomorrow (Saturday, October 4th) to make one or more handmade cards. And then connect with me on Facebook: www.Facebook.com/YourPaperDreams

I'll be posting throughout the day with updated totals of cards we've collectively made, and some other stuff that just MIGHT lead to your winning a prize! But of course you can only win if you're participating! So keep checkin' in throughout the day and sharing how YOUR cardmaking is going.  (Tip: don't wait to see something posted in your FB newsfeed, because only a small percentage of posts are likely to show up there. It's actually best to visit my page at the address above.)

So what kind of card(s)?

Well, ANY kind of handmade card counts! But some ideas that come quickly to mind include:

  • Catch up on some Paper Pumpkin (or other Stampin' Up! card kits) if you've been letting them accumulate
  • Get a good strong start on your Christmas cards (or if you're feeling really ambitious, make a full day of it and get 'em completely DONE!)
  • Lay in a stash of the birthday, anniversary and thank-you cards you'll need for the rest of the year. Just think how convenient it'll be to have something all ready to go on those busy days you're tied up with other holiday activities!
  • Make some cards to donate to a favorite organization: "sunshine" type cards for members of your church, some cards of support and thanks for service members, or cards to donate to a fund-raising raffle.
Stamp_Stock_Save_top copy

And here's something timely from Stampin' Up!…… A "Stamp, Stock & Save" stock-up special! In a nutshell, EVERY color of Classic ink pad, and all assortment packs of 8-1/2 x 11 cardstock, and envelopes & a few other things are ON SALE through Monday (Oct. 6th). This is the first time I ever recall such a generous cross-section of "basics" on sale at the same time, so if you're finding your basic supplies looking a little thin (or you still need something to complete your ink & paper collection), now's the time to stock up! But you'll want to hurry, because this all ends on Monday!

Click here to choose your favorites!

Throwback Thursday – Ancient Stamp Camp

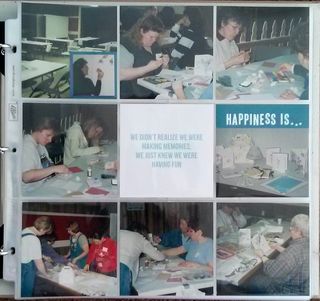
TBT_Stamp_Camp_leftWell this is my first official "Throwback Thursday" post. These past couple of weeks I've really been sucking up all the info I can about Project Life®, and have fallen head-over-heals in love with the system.  And now that we're carrying our own line of Project Life products (Project Life® by Stampin' Up!®), I've actually been making progress in getting this past summer's pictures into an album where they belong!  (Yay, me!)

And I'm also proud of myself for having taken fairly regular pictures, too.  Probably more this summer than just about any I can recall. Of course not as many as I would have LIKED to have taken, but definitely an improvement upon my usual style of – "Oh darn….. sure wish I had some pictures of that event!"

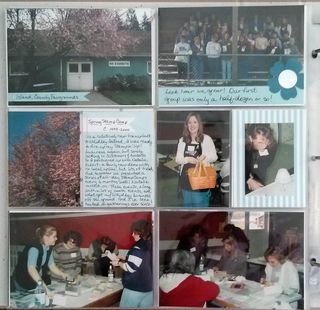
TBT_Stamp_CampBut it seems that getting pictures into their appropriate spots leads one to dig deeper for even more. And yesterday while digging through some super-oldies I came across a group from one of the earliest Stamp Camps I hosted. (I actually co-hosted this series with another demonstrator, and we both always worked SO hard that it's no wonder we only had energy to do 'em twice a year!) Back in those days we were using facilities at the Island County Fairgrounds (Whidbey Island, WA) for our day-long Stamp Camps. Certainly not the most pleasant of environments for spending the day, but everyone had fun nonetheless.

Join me in this walk down memory lane (from probably about 1999 or 2000, I think), and in giving thanks that stamping styles have evolved since then! Oh.My.Goodness! 
So hey! Who do ya recognize here?