Thoughtful Branches – Fall Leaves

20160826_170259wm

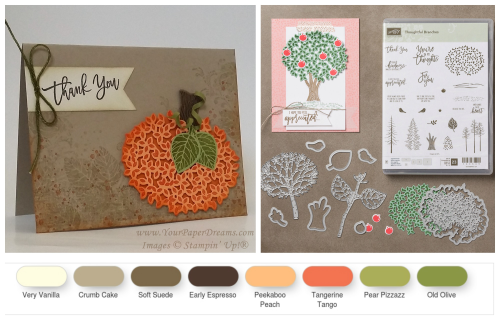
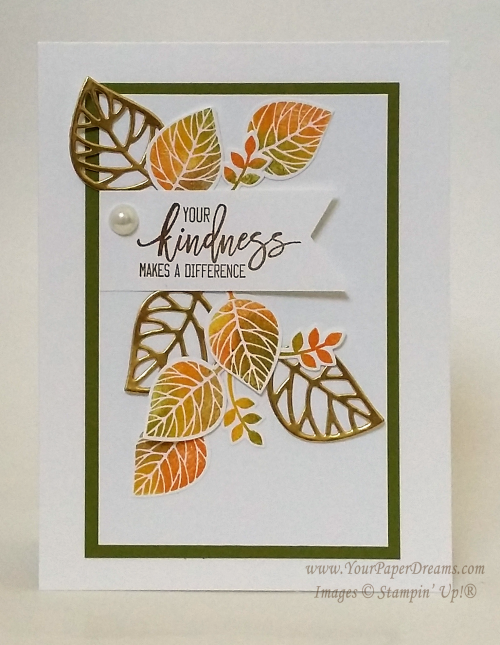
Yep, this time it's a fall card! Again, a "Lynda version" of a card that's been all over the 'net, and I loved the contrast between the die-cut lacy leaves and the solid, multi-color ones. Some versions of this card "out there" use a fun, but rather messy inking technique. But since I had designed my version for class, "messy" wasn't something I particularly wanted to tackle.

20160826_170259-562wm

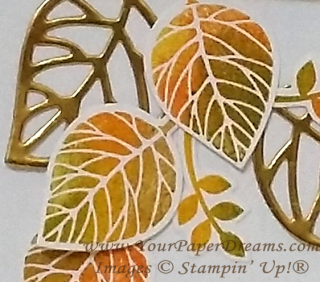
So here's how WE got a similar multi-color, autumn effect.  It's a pattern that you repeat for each individual image:


  • Start with a clean stamp. (Good idea to keep a damp paper towel handy.)
  • Ink up the stamp with Daffodil Delight, but do not stamp with it yet.
  • Lay out all your remaining leaf color inks in order from light to dark, left to right, and have a sponge dauber at hand for each one. (At my class we laid out Pumpkin Pie, Old Olive & Soft Suede.)
  • Onto your yellow-inked stamp, "daub" (is that a real word?!?) a couple of other colors directly onto small areas of the stamp….. one at a time, and always working from lightest to darkest. So because of the order we'd laid out the inks, that would mean Pumpkin Pie followed by Old Olive, OR Old Olive and then Soft Suede.  Pay attention to where you daub each color on the stamp so you don't overlap sections entirely.
  • Once that was done, there would be 3 colors on the stamp (Daffodil Delight + 2 others), and after "huffing" on it, it was time to stamp the image (onto a scrap of Whisper White cardstock).
  • Clean the stamp and get ready to repeat the process for the next leaf.

We stamped (and then die-cut) enough of these colored leaves for not only the front of the card, but also one or more for the inside, too. 

And we followed the same process for those little "flowery-leafy-thingies", too. 

After layering up the main pieces on the card front, we made the banner with the sentiment and anchored that in place…..

And then the lacy-leaves (cut with the corresponding stem-and-leaves die from this bundle – from Gold Foil paper) were laid in place to give a general shape to the layout. And finally, all pieces were tacked down with either strategically-placed dots of glue from the Fine Tip glue pen or the Tombow Multipurpose glue. (Repeat after me, Lynda's cardinal rule of glue-use:  "Less is more. Less is more. Less is more!")

A large (retired) pearl finished it off (and ensured it would cost an additional 21-cents to mail)!
Fall leaves card

Thoughtful Branches – A spring/summer hydrangea

2

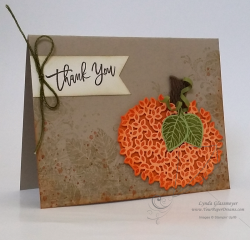
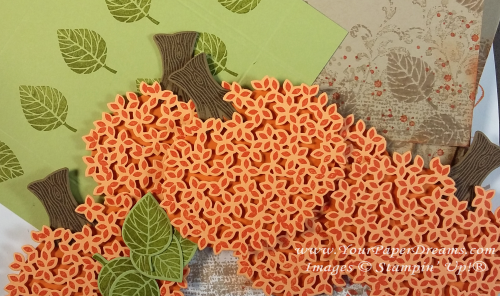
At my card classes earlier this month we capitalized on the versatility of the Thoughtful Branches Photopolymer Bundle and stamped up cards representing spring/summer, fall and winter. (See an additional fall card here.) Today I'd like to share our spring/summer card. Isn't it fascinating how the same stamp/die combo turned one way and stamped in orange can be a pumpkin….

20160826_170500-800wm

 yet  flipped over and stamped in a different color becomes a hydrangea?!?  Yes, I do believe this bundle from Stampin' Up!® is truly one of the top most creative and versatile they've produced. And I'm so sad that in only 3 more days it will go away. 

20160826_170354-wm

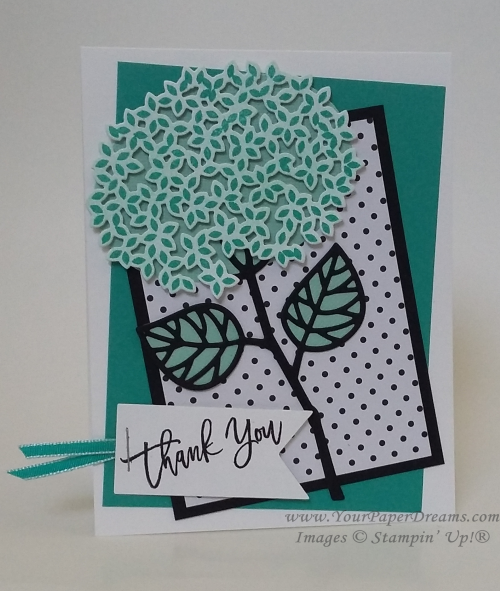
The color palette for this card is simple and fresh - generally monochromatic with its Whisper White, Basic Black, Pool Party & Bermuda Bay. The basic idea was something I'd seen online, but then I added my own tweaks, including the jaunty angles of the layers for an extra punch of fun.

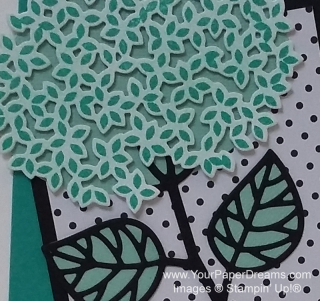
For the hydrangea, we first tinted a piece of Whisper White cardstock a light shade of Pool Party with one of our new sponge brayers.  Then stamped over that with Bermuda Bay before die-cutting that wonderful lacy shape. Then layered that piece over an oval (of Pool Party cardstock) to provide the sense of dimension…. just as I'd done with the pumpkin.

20160826_170354-800wm

The stem & leaf were die-cut as well (Basic Black), and the stem adhered to the underneath oval with tiny spots from the Fine-tip glue pen. To back the leaves, we traced the shape of the die itself onto scraps of Pool Party and cut them out by hand before adhering behind the detailed black layer. The black polka-dotted layer comes from Pop of Pink Specialty Designer Series Paper, a HOT DSP package found in the still-newish annual catalog. (You can never have too many polka dots, can you? And when they're black they go with EVERYTHING!)

And here's a fuss-free tip for cutting a banner exactly the right length for your sentiment:

  1. Cut a piece of cardstock as wide as you wish your finished banner to be, and plenty longer than you want its finished length to be.
  2. Notch one end with the Banner Triple Punch.
  3. Orient the notched edge according to your ultimate design, and stamp your sentiment close to the notch.
  4.  Then clip off any extra length – to yield a perfectly-sized stamped banner!

Stay tuned for the "fall" and "winter" examples -  from our card classes earlier this month!

  Product List


Thoughtful Branches – one of my all-time favorite bundles ever!

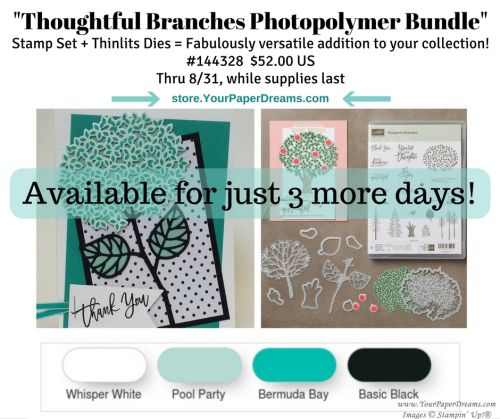
This month I've been in love. In love with what has got to be one of Stampin' Up!'s most versatile stamp set & dies bundles ever offered! And wouldn't you know it's only going to be available to the public for just THIS month – of August 2016!?!

If you haven't already seen this bundle all over the 'net, I suppose that means you must not have been ON the 'net, because it's everywhere you look – shown in amazing creative and colorful designs.  Um, but wait, wait! Please don't head off to Pinterest quite yet; you'll probably want to finish reading what I've got here for ya first!

Thoughtful Branches Bundle

This bundle is truly unique. Not shown or available in any catalog, it's only been available during August 2016…. and *will* be only while supplies last – through the 31st. (Fingers crossed that inventories will hold out that long, but you never know.) With 23 photopolymer stamps, and 9 coordinating Thinlits dies, and amazing versatility in its design, this is one bundle you'll definitely want to add to your collection if you haven't snagged it already. 

At my card classes earlier in the month, all 3 designs featured this set of stamps & dies – as we made a spring/summer card, a fall card, and a winter card. (Watch for those 3 designs to post in the upcoming days.)

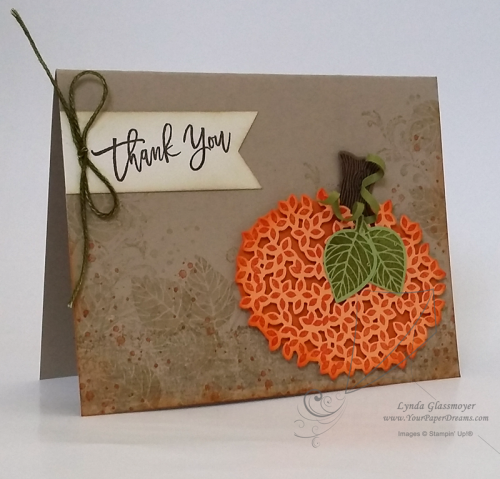
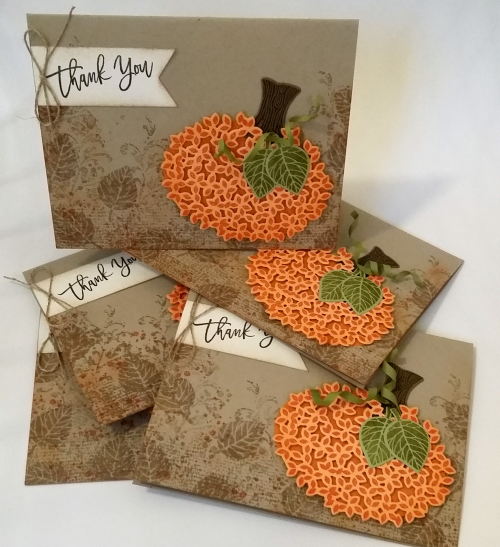
But then when I needed a pile of thank-you notes for my August orders, I once again turned to this bundle…. and made up the card shown here.

  20160826_170500-800wm


Actually, I got on a roll and made several of 'em.

20160827_164019_in_progress20160827_185945

You may also notice that in addition to the Thoughtful Branches Bundle, I also used Timeless Textures in the background.  (Another very worthwhile stamp set to own.)

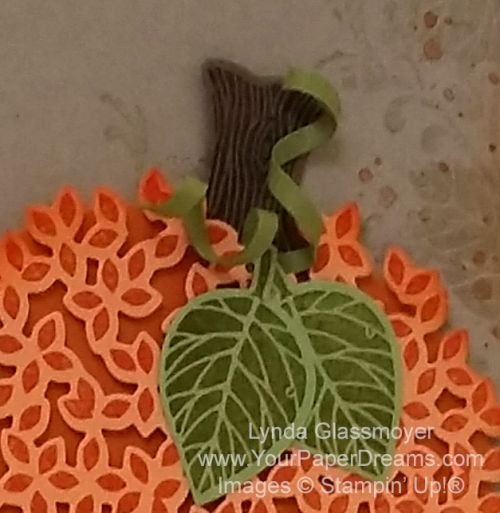
I have also fielded some questions about how I created the "tendrils" (curly-cues) at the top of the pumpkin. That's actually a 1/8" wide piece of Old Olive cardstock, wound around a skewer to shape the spiral. Then I snipped the curled piece in half and glued one end of each piece at the base of the pumpkin "stem" (which is really an upside-down tree trunk stamp & die).

Behind the die-cut fancy layer of Peekaboo Peach cardstock with Tangerine Tango ink lies an oval piece of Pumpkin Pie cardstock. Tiny snips of Stampin' Dimensionals hold the layers apart – to preserve the intricacies and detail of the die-cut layer.

20160826_170500-627wm


If you're still deciding whether or not you want this bundle, technically you still have through Wednesday the 31st, to call it yours. But why wait and run the risk of inventories running out before then? Claim both of these versatile selections here. I doubt you'll be sorry….


From the “You learn something new every day” files…

FUTZYSo the other day I'm explaining to a group of ladies at card class about how to do this rather futzy project, and they all start twittering about my use of the word "futzy". Seems no one's ever heard that word before. And they want to know where I'd heard it.

Well, truth is, I have no idea. I just know it's been part of my vocabulary for as long as I can remember. It's a word. It has meaning. And it pops out of my mouth when it's the most appropriate adjective for the circumstances.

I grew up in the Midwest (except for several years in Spain), but have been on the West Coast since my middle teens. If any of that's meaningful, then that's probably where I learned the word.

So the ladies tried to educate me. "Fussy", they corrected. Well, yeah, I guess that could be a synonym for "futzy"…. yet it's not exactly the same. Doesn't go to the exact point; doesn't have the same punch. There's "fussy cutting", which we papercrafters all know about, but this project was a bit "futzy". Definitely NOT the same thing!

Curious, I went to Google for a definition. To prove that "futzy" is a real word. 'Cuz Google knows everything. And guess what? Even Google couldn't turn up a definition! But it did find references where the word in question had been used in various writings. Most, in the correct context even. (Compilation of more or less correct usages can be found here, and it's fairly easy to surmise the definition from its context.)

Next, I looked up "futz", 'cuz I figured it was related. As in, I futzed (v.) around a bit while designing (v.) the card in question, and therefore (per my reasoning), the design (n.) is a bit "futzy" (adj.).  And what I discovered is that if you're looking for a cool way to play your "z" in Scrabble, then laying out "f-u-t-z" is perfectly legit. I also learned some real interesting background about the origins of the word. But I won't recite them here 'cuz they make me blush and this is a G-rated blog.  

But I guess I'll have to keep digging to uncover why there's an adjective out there with obvious meaning and usage, yet apparently no definition.

When the packaging’s just gotta coordinate with the contents

Packaging collage

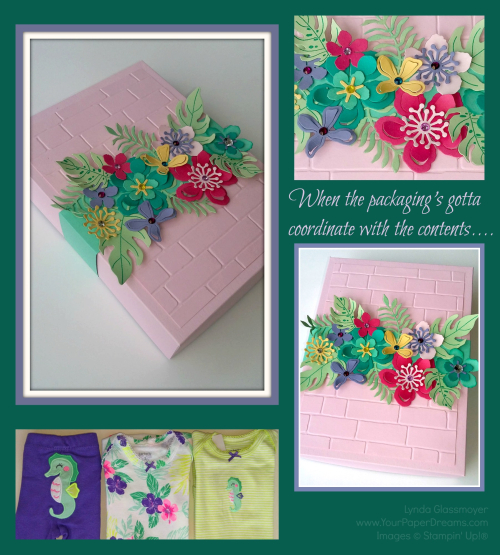
I had occasion recently to wrap a baby gift. Now, this wasn't just some random baby gift, but rather, in celebration of the upcoming arrival of my 2nd granddaughter. So if there's ever a reason to spend a little extra time wrapping something, I figure that that would qualify. I'd picked out this adorable little 3-piece set – 2 onsies and a coordinating pair of pants/leggings. Yes, I know the pant legs will be too long; manufacturers have had DECADES to figure out babies' legs aren't proportioned to the rest of their bodies yet, but for some reason they refuse to adjust accordingly. But I digress. I had this cute little clothing ensemble and it needed to be wrapped. Appropriately.

So the first thing I reached for was cardstock in colors close to those of the clothes. Minus purple, of course; I already knew that wasn't
gonna happen. But I was Botanical-Builder-Box-close-up-800-wmsurprised to see how tough it was to match the other colors, too! Especially a yellow-green. Came up empty-handed there, too. But eventually I ended up pulling out some scraps of retired In Colors: Strawberry Slush, Pistachio Pudding and Coastal Cabana…… and then added Bermuda Bay, Pink Pirouette, Wisteria Wonder and So Saffron to round out my options. 

To determine the size of the box I folded (and refolded) the 3 items until I
could stack them up into a size I could create a box for (using only 8-1/2" x 11" cardstock, 'cuz that's what I had available). Luckily, I determined I could do that with a box 5-1/2" x 7-1/2"….. and 1-1/2" deep. YAY!  So I just trimmed a half-inch off the bottom of a full sheet each of Wisteria Wonder (for the box bottom), and Pink Pirouette for the box top. (Leaving me with 8-1/2" x 10-1/2".) Scored 1-1/2" borders all the way around for the bottom, and just the teeniest smidge narrower for the top.  (This technique leaves the box top just that itsy-bitsy bit larger so it'll fit over the bottom.) 

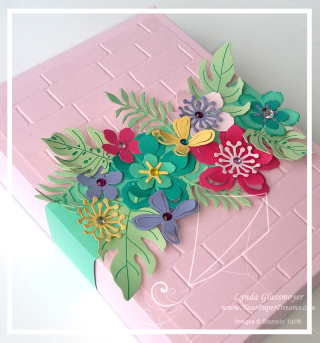
Botanical-Builder-Box-800-wmAfter assembling the box I determined that that much surface looked just a little bit  "flat", so I added a layer using the Brick Wall embossing folder. Figured that made a decent base to work with, and the fun was about to begin.

Now, I have to confess that I love flowers (DUH! Those of you who know me aren't surprised, are ya?), and after 20 years of working with flowers in the paper and ink world I've figured out it's not likely I'll ever tire of them. And whenever I can combine flowers with DIMENSION, so much the better. So it's really no wonder the Botanical Builder Framelits have become my "go to" faves these days. 

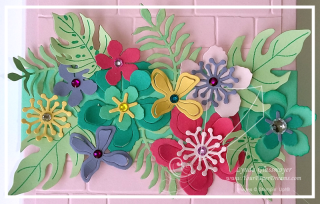
So this is the result. I shaped the flower petals and leaves with a bone folder and also wrapped some elements loosely around a white gel pen. (Ugh! Just realize that's been retired. YIKES! How'd I miss that?!?) All the flowers are glued to a belly band that simply slides off to open the box. I love belly bands on boxes for this purpose; you can get as elaborate as you want with the decoration, and yet nothing has to be untied or otherwise destroyed when it's time to access the box's contents.  A perfect packaging solution in my book!

Buy NOW, get a coupon for NEXT month!

Now here's something ELSE really cool! Right now (and through the remainder of July, actually), for every $50 of product you order through me (at one time, that is), you'll get an emailed coupon worth $5 towards product(s) you order NEXT month. (Specifically Aug. 2 – Aug. 31 .) And there are no limits as to how many $5 coupons you can accrue; you'll get one for every $50. So for instance, if you like the Botanical Builder Framelits AND the coordinating Botanical Blooms Stamp Set I've used on this project, well, guess what?! ? Conveniently, they both add up to $50, and BOOM! you've earned a coupon to spend next month! Or choose $150 in product (ordered at one time) and get not only THREE $5 coupons for next month ($15 value, that is), but also $15 in Stampin' Rewards THIS month, too! Get the idea?!?

Here are the products I used on this project; items that are currently available (at time of this writing) will link to my online store:


Strawberry Slush 8-1/2" X 11" Card Stock

Strawberry Slush 8-1/2" X 11" Card Stock
[131295]
$6.95
Pistachio Pudding 8-1/2" X 11" Card Stock

Pistachio Pudding 8-1/2" X 11" Card Stock
[131294]
$6.95
Coastal Cabana 8-1/2" X 11" Card Stock

Coastal Cabana 8-1/2" X 11" Card Stock
[131297]
$6.95
White Signo Uni-Ball Gel Pen

White Signo Uni-Ball Gel Pen
[105021]
$4.00


Out with the OLD to make way for the NEW – stamps, that is

1Well jeepers, creepers! I can't believe how long it's been since I posted here! Does that mean I've been sitting around watching TV and eating bon-bons in my PJ's? Ha ha… hardly! Actually, I've HARDLY even been in town as I've fixated on the goal of getting my folks' house ready to sell – back where they used to live. So I've been out of town just about exactly half of the past 6 months, and with very limited access to the internet during that time. So I've still been workin', but largely (and thankfully temporarily) focused in a different direction. But the good news is I've always seen the light at the end of the tunnel, and I'm now only a handful of weeks away from closing the door on that project and having more time to focus on the things I love – family and my paper-crafty friends!

But as they say, time waits for no one, and regardless of my own personal set of circumstances, the Stampin' Up! calendar marches onward. I just returned yesterday from an awesome trip to Salt Lake City for Stampin' Up!'s convention (now known as "OnStage Live"), where we saw and learned about the gorgeous products in the upcoming Annual Catalog. Let me just say you're going to swoon….. and that's about all I can say while I'm still sworn to secrecy!

But in the meantime, I CAN tell you that the items that will be retiring from the current line and that will NOT be continuing with us – will soon be revealed. And THAT is what I'd like to give you a little bit of inside information about. (And this "inside information" only comes from many years' experience with this process.) 

Lynda's PSA:

If you still have your heart set on acquiring any accessories from either the Occasions Catalog or the 2015 – 2016 Annual Catalog, best get 'em now. BEFORE the list is revealed.

Because once that "Retiring" list becomes public, the most popular items tend to vanish. Often within only hours. So by the time many crafters get a chance to sit down, leisurely peruse "the list" and think about submitting an order – their favorite things have already sold out. Participation in this whole "retiring list" thing isn't for the faint of heart. 

So consider this fair warning. Don't be "that girl" who waits until it's too late again. Instead, grab your wish list (you know, the one you've been working on since roughly this time LAST year?!?), check for any "accessories" still hanging around on there, and order 'em. Now.

And while you're at it, don't forget the 2014 – 2016 In Color items. We don't need an official list to tell us THEY'RE retiring! Do you have all the ink pads you have wanted? What about the ink refills? (Those typically sell out almost immediately once the official list publishes.) And enough coordinating cardstock to carry you through? 

Bottom line is that list is coming. And soon. Really soon. And if things go as in past years, the hottest items WILL sell out. Quickly. All that remains to be seen is whether YOU got what YOU wanted….

Merry Christmas 2015

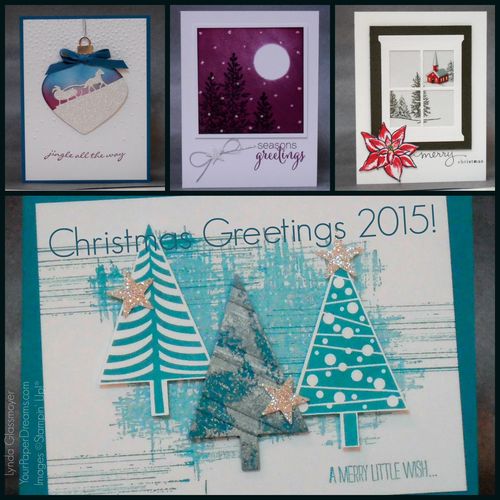
Christmas Greetings 2015
So yeah, I know. I've been MIA again. Many of you know I've had lots of family stuff going on recently that's been occupying big chunks of my time. BUT I just wanted to pop in here and wish all my stampin' friends a very Merry Christmas. And to my loyal customers…. a special word of thanks for supporting me and my business throughout this past year and expecially these past several months! I appreciate you and look forward to an awesome 2016!

Post Falls High School Craft Fair 2015

I had a ton of fun chatting with so many friendly people at the Post Falls High School Craft Fair on Saturday! And was especially impressed to see how many Stampin' Up! demonstrators dropped by! I think by day's end there had been about 7 or 8 demonstrators who'd popped in and introduced themselves; now, if only I was good with faces and names to remember 'em all for *next* time, lol!

And the morning crowd was amazing; I remember looking up at one point and seeing the (quite wide) aisle completely filled with people in both directions. This was obviously not only a craft fair, but the day's social meeting point as well!  🙂

If you've attended one of my booth events over the years you know that I'm not one to just hang and wait for someone to show up. But rather, I generally keep myself busy stamping some kind of little give-away goodies. This year and last I chose gift tags for that item, and this year I particularly wanted something I could crank out quickly and not have to clean stamps along the way. So what's my favorite "quick stamp" technique?  Something monochromatic! Not only can a single color of ink be a real wow, but it holds down supply costs and there's zero chance of sticking the stamp into the wrong ink pad! (Something that's always embarrassing to do in front of an audience.) I knew my working space would be limited, so the simpler, the better, I figured.

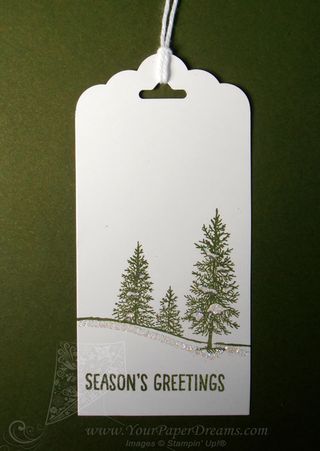
So here's the simple, monochromatic design I made and gave away 60-some Tag_Mossy_Meadow
of in 6 hours.  (Actually, more like 4-1/2 hours, because the last hour and a half of the 6-hour show was basically dead.)

This tag began as a 2" x 4" piece of Whisper White cardstock. I chose Mossy Meadow for the ink color, and then there were just a few simple steps…..

  1. I chomped off one end with the Scalloped Tag Topper punch.
  2. The snowy trees image (from "Happy Scenes" stamp set) was placed about 1/3 of the way up from the bottom. (Remember that when using photopolymer stamps, I always recommend placing a piercing mat underneath to compensate for the lack of foam layer on the stamp itself.)
  3. "Season's Greetings" image (from the same set) was placed in the lower area, closer to the left edge for weight balance.
  4. I applied 2-way glue pen in the areas to be glittered….
  5. Then dunked into Dazzling Diamonds glitter and shook off excess.
  6. Finally, I folded a 12" length of Whisper White Bakers Twine in half, brought the two ends together through the tag hole from back to front and looped through the fold for the tag ties.

IF I'd been able to find a "To / From" stamp I'd have either positioned that in the upper left-hand corner or on the back, but after searching in vain through my entire collection of current stamps I sadly concluded I must have sold or retired any such stamps that I once owned. Shoot. There are 3 such pairs of stamps in the current Holiday Catalog, and at least that many in the Annual Catalog, but doggone if I could find 'em when I was tearing through my stuff searching for 'em, lol! Oh well, we'll just call that "white space" – an important element of design, too.

Product List

AND DON'T MISS THIS WEEK'S "WEEKLY DEALS" – available until discounted supplies are exhausted, or thru Monday, Nov. 16, whichever occurs first:

Thinlits & Framelits Dies Storage

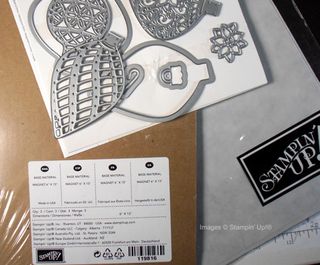
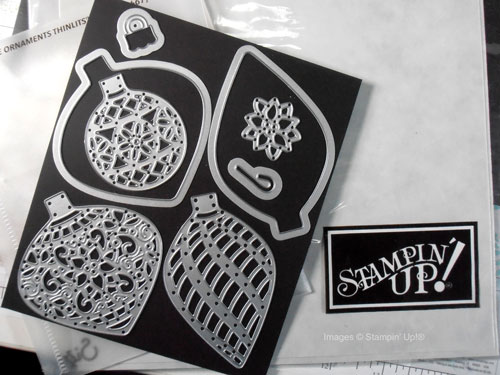
Framelits-dies - storage-magnetSo I've spent much of the past week and a half or so digging in my storage rooms, discovering, purging and organizing things I haven't seen since I moved out of my house just about 3 years ago. Some of what I've run across has caused me to raise an eyebrow, and some has been cause for celebration. One example of the latter category was running across a generous supply of now-retired Stampin' Up! magnetic sheets. In fact that discovery was SO exciting I think I literally exclaimed aloud! You see, I've been out of magnetic sheets recently, and consequently have been struggling with storing my new "Delicate Ornament Thinlits Dies". Seemed I only had a choice of leaving them stuck (and I do mean STUCK) to the sheet they arrived on, risking bending them out of shape every time I peeled them off, or dumping them loose into their plastic jacket. And neither option was making me very happy.

So it was particularly exciting to run across this generous stash of magnet sheets, even though retired. And now that I've Framelits-dies-storage---magnet2tamed my "Delicate Ornaments" dilemma, here's my simple tip:

  • Cut a piece of magnet sheet (5-1/8" x 6" works for this set), and (because it's peel-and-stick) adhere it to a piece of cardstock or DSP backing board exactly the same size. (Get your dimensions by measuring your storage envelope and choosing measurements slightly smaller.)
  • Arrange the dies, flat-side-down, so they fit on the magnet sheet.
  • Insert into the storage envelope.
  • Stop being frustrated!

That's all there is to it! Sometimes, it's just the little things that make me big-time happy!


Garden in Bloom meets Fun Frames

Get the Look - Garden in Bloom meets Fun Frame

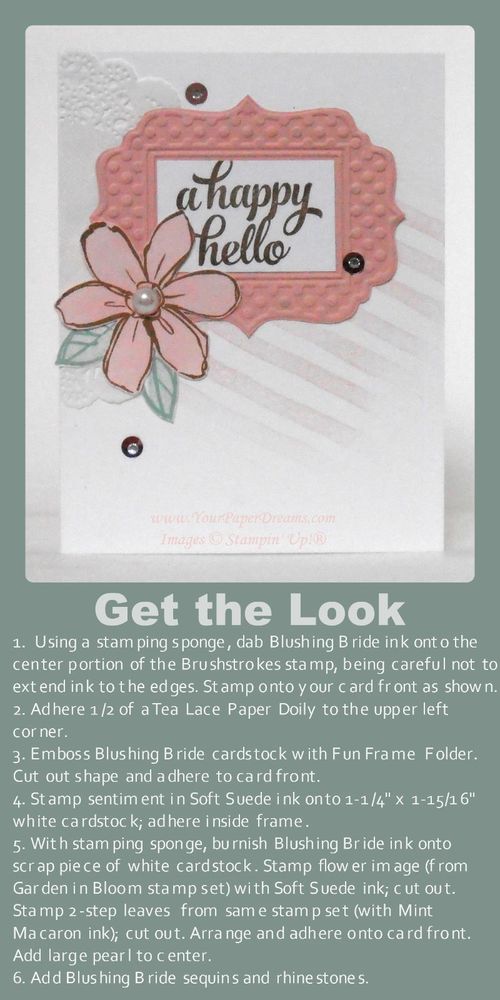
One of today's trendy looks is creating a focal point from a grouping of individual elements. Often, the sentiment is included as one of those grouped elements, and there may also be subtle texture or other visual interest in the background. This card features all of those.

Those who've been following me for a while know that some of my favorite techniques involve applying ink in non-traditional ways. This card features two such examples.

The diagonal lines of the background represent the first such technique. To get that look, I inked a stamping sponge (just by pouncing it on the Blushing Bride pad), and then dabbed it onto the center portion of the Brushstrokes stamp. I was careful to avoid extending the ink as far as any of the edges of the stamp, as that would give a harsh edge when stamped. Rather, what I was looking for here was a softer, more cloudy look, where the inked image just kind of fades in and out. Once the ink was applied, I stamped the background at that jaunty angle for yet more visual interest.

Another favorite way I like to use ink a little "out of the box" is when I want a piece of colored cardstock that's more subtle than the intense colors of our regular cardstocks. In this case I wanted a Blushing Bride flower, but a much softer shade of it than the Fun Frame it would be backed with. So I just burnished Blushing Bride ink onto a scrap piece of Whisper White cardstock with a stamping sponge before stamping the flower image onto it. (My version of "burnish" is to rub ink down into the cardstock in a circular motion. I actually do try to rub the ink right into the cardstock, so I start with a light hand and then get firmer and firmer as I rub in circles. Every time I reload the sponge from the ink pad I am careful to tap my sponge off once or twice onto my scratch paper so I don't accidentally get a "blob" of ink when I first touch the paper I'm working on. You can always add more ink, but can't take it away if you get a "blob", ya know.) So once I decided I had the color intensity I wanted for this, I just stamped the flower image (from Garden in Bloom) right onto my newly-colored paper and then fussy-cut it with Paper Snips.

The leaves are stamped in the more usual 2-step method this stamp set was designed for….. and then also fussy-cut.

When I first introduced this card at card class last month several of the ladies groaned at the assumption they'd have to cut out the center section of the embossed Fun Frame. But no worries there; it's just it's own layer of Whisper White cardstock (1-1/4" x 1-15/16") – stamped and applied on top of the frame! Easy-peasy!

Even though none of these elements is popped up on Stampin' Dimensionals I still wanted to retain a suggestion of depth anyway. So I only applied adhesive to the center areas of the frame, doily and flower, leaving their outer edges free.

Oh! And a tip for applying the sequins: place a tiny dot of Fine-tip Glue where you want the sequin to be, then lay the sequin right over it. Remember – that's a "TINY!" dot, in order to avoid a glue smear!

Don't you think this same general layout would be fun to work up into a Christmas card? I'd love to see your examples if you do that!


Product List