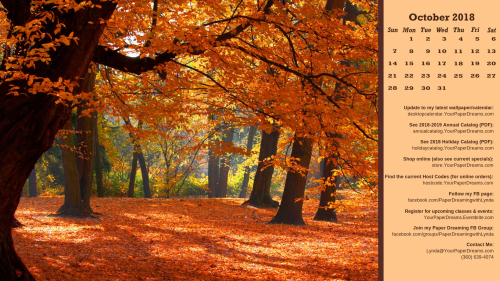
October’s desktop wallpaper & calendar is ready to download

2018 - 10 - October - tinified
Well, it's official. The weather is becoming chillier, and just yesterday the thought of turning on the heat crossed my mind for the first time in many months. (I quickly beat that idea back, though; I'm just not quite ready to there THERE yet, lol!) But a couple trees across the street from where I sit at my desk have adorned themselves in lovely examples of Cherry Cobbler and Fresh Fig, and soon my favorite tree over there will be ablaze in Crushed Curry. I do enjoy watching those trees transform themselves throughout each season.
 
My monthly desktop wallpaper background not only offers you a pretty seasonal picture to brighten your computer monitor, but also includes a handy monthly calendar and serves as a cheat sheet reference to websites you may want to know about and visit.  And it's even FREE to download and install, so please don't hesitate to share this page with your friends and family.
 
 
You'll probably want to consult your own computer operating system's installation instructions, but installing the background image on my Windows 10 system takes just 3 quick steps – and less than a minute. It's super-duper, easy-peasy!
  1. I download and save the image to my computer - from the link just above that starts with "Click HERE". (NOT from the picture that appears at the top of this post!)  TIP:  To "download" the full-resolution image once it's open (from Google Drive where it's stored), I click on the downward-pointing arrow. THAT is what actually begins the download process to my computer.
  2. Once the file has been downloaded, named and saved to my computer's hard drive, I open it. 
  3. Then I right-click on the image and select "Set as" > "Set as Background"….. then right-click again and select "Set as" > "Set as Lock screen". And poof! That's all there is to it! (For convenience, I install this on both my desktop system as well as my laptop.)
And in case you may have an operating system OTHER than Windows 10, these tips may help with installation:
 
Finally, please keep in mind that the format of my monthly picture is designed for most modern-day 16:9 monitors (a common format for monitors and HD TV's since about 2009), oriented in landscape format. (1920 x 1080 pixels.) If you're working with an older monitor (one that is more square-ish in format), or your monitor is set up in portrait format, the picture will probably not work for you. Sorry 'bout that.

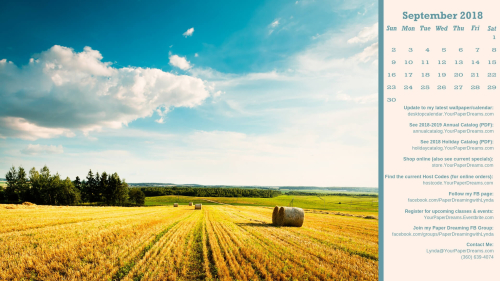
September wallpaper/calendar is ready to download – for real this time!

2018 - 9 - September - tinified
 
Yay! It's officially official! The Holiday Catalog is now available for ordering from, and along with that, now I can publish the entire September wallpaper image! Thanks for your patience while we awaited the magic date. If you're a regular customer of mine you should already have your copy of the brand-new Holiday Catalog, but if you don't have one, you can catch the PDF here…. and if you don't have another demonstrator you already work with, then please ask me for your personal copy soon!
 
My monthly desktop wallpaper background not only offers you a pretty seasonal picture to brighten your computer monitor, but also includes a handy monthly calendar and serves as a cheat sheet reference to websites you may want to know about and visit.  And it's even FREE to download and install, so please don't hesitate to share this page with your friends and family.
 
 
You'll probably want to consult your own computer operating system's installation instructions, but installing the background image on my Windows 10 system takes just 3 quick steps – and less than a minute. It's super-duper easy-peasy!
  1. I download and save the image to my computer - from the link just above that starts with "Click HERE". (NOT from the picture that appears at the top of this post!)  TIP:  To "download" the full-resolution image once it's open (from Google Drive where it's stored), I click on the downward-pointing arrow. THAT is what actually begins the download process to my computer.
  2. Once the file has been downloaded, named and saved to my computer's hard drive, I open it. 
  3. Then I right-click on the image and select "Set as" > "Set as Background"….. then right-click again and select "Set as" > "Set as Lock screen". And poof! That's all there is to it! (For convenience, I install this on both my desktop system as well as my laptop.)
And in case you may have an operating system OTHER than Windows 10, these tips may help with installation:
 
Finally, please keep in mind that the format of my monthly picture is designed for most modern-day 16:9 monitors (a common format for monitors and HD TV's since about 2009), oriented in landscape format. (1920 x 1080 pixels.) If you're working with an older monitor (one that is more square-ish in format), or your monitor is set up in portrait format, the picture will probably not work for you. Sorry 'bout that.

September wallpaper/calendar is ready to download

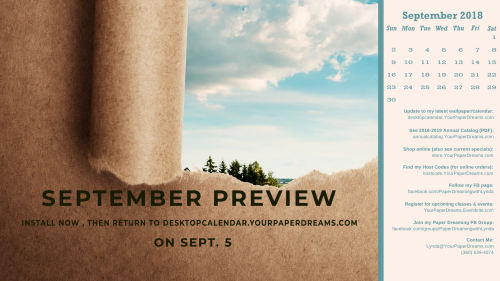
Well, it's "sort of" ready, that is. 2018 - 9 - September - tinified

You see, I'm not allowed to publish the URL of the Holiday Catalog before it goes live on Wednesday, so I can't actually complete and publish the complete version of the September desktop wallpaper/calendar yet. So I've created a sneak peek for you to install now (so you'll at least have the calendar part), and then on the 5th, come back here and grab the completed file. (desktopcalendar.YourPaperDreams.com)

At that time I'll rip off the disguise and unveil the completed image. Fair 'enuff?

Click HERE to download your FREE background & calendar.

You'll probably want to consult your own computer operating system's installation instructions, but installing the background image on my Windows 10 system takes just 3 quick steps – and less than a minute. It's super-duper easy-peasy!
  1. I download and save the image to my computer - from the link just above that starts with "Click HERE". (NOT from the picture that appears at the top of this post!)  TIP:  To "download" the full-resolution image once it's open (from Google Drive where it's stored), I click on the downward-pointing arrow. THAT is what actually begins the download process to my computer.
  2. Once the file has been downloaded, named and saved to my computer's hard drive, I open it. 
  3. Then I right-click on the image and select "Set as" > "Set as Background"….. then right-click again and select "Set as" > "Set as Lock screen". And poof! That's all there is to it! (For convenience, I install this on both my desktop system as well as my laptop.)
And in case you may have an operating system OTHER than Windows 10, these tips may help with installation:
 
Finally, please keep in mind that the format of my monthly picture is designed for most modern-day 16:9 monitors (a common format for monitors and HD TV's since about 2009), oriented in landscape format. (1920 x 1080 pixels.) If you're working with an older monitor (one that is more square-ish in format), or your monitor is set up in portrait format, the picture will probably not work for you. Sorry 'bout that.
 
See you back here in just a few more days!


Color Your Season – Part 6

20180817_151535
Squeaking in with my 6th sample of the Color Your Season bundle – available for only a few more hours today!

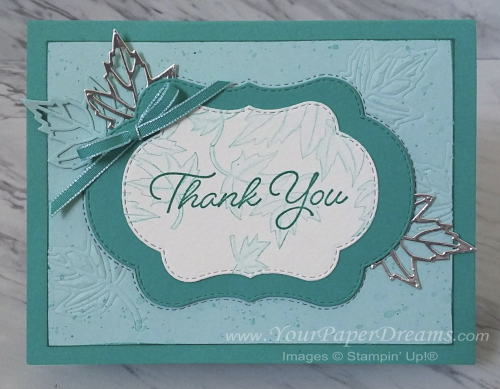
For this card, I chose a monochromatic theme featuring Pool Party and Bermuda Bay. And of course, it features the Blended Seasons bundle (double-volume stamp set + coordinating dies) that has been available this month of August only. While I've used several elements from the bundle, I think the stars of the layout are the 2 stitched-edged dies used as layers in the center area. Don't you just love how these dies cut stitched details on both the inside and outside of the shape? Given that there are 3 sizes of these shapes in the bundle, it's just about worth adding this die set to your collection JUST because of its versatility!

Ok, here are some of the significant details of how this came together:

The base layer is simply a typical folded half-sheet of Bermuda Bay cardstock. The next layer up (Pool Party) features some texture created with the leaf die (from the die set) and the embossing mats. And then all that is splattered with Bermuda Bay ink from an aqua painter. Finally, I added some Bermuda Bay to the edges, using direct-to-paper.

Next up, a few die-cut leaves (Pool Party cardstock + Silver Foil paper), followed by a layer of Bermuda Bay cardstock die-cut with one of the stitched shapes in the bundle.

The top layer (whisper white) is smaller size of the same stitched shape, stamped with a 3rd-generation application of Bermuda Bay ink with the falling leaves stamp from the stamp set – and then carefully blended out with a blender pen. Then over top of that, I stamped the "Thank You" sentiment (also from that same stamp set) with the aid of the Stamparatus so that I could stamp it several times for enhanced color depth. 

The bow is from a piece of retired Bermuda Bay ribbon I still have lying around.

If you haven't YET grabbed your "Color Your Season" bundle (and/or the Watercolor Pencils that are included in this special limited-edition offer), there are still a few hours this month left to do so! AND you could easily qualify for a $5 coupon to redeem towards your order NEXT month! Don't kick yourself for missing out on this fabulous, versatile bundle! Get yours here.

"BONUS DAYS" reminder!
 
With every $50 product order you place in August,
you'll get a coupon for $5 off your September order. No limit!
So if your product total is getting close to $50, $100, or $150, etc., then you might want to bump it up.
Also, don't forget that orders of $150 or more (that aren't part of a hosted event) always qualify for Stampin' Rewards, too…
meaning at least $15 in additional free products in your box!


Color Your Season – Part 5

20180817_151805

Only 3 days left for availability of this exclusive, limited-edition stamp set, dies and watercolor pencils collection, and I've still got 2 samples to show. Yikes! I've had the samples ready for a long time, but have been particularly tied up with personal life stuff this past couple of weeks. But I'd better get on the ball to meet my goal of showing 6 cards while these products are still available, huh?

This one features 2 of the 3 dies that have those lovely stitching marks around not only the inner edge of the die (as shown in this example), but they're also on the negative part of the die (so they'd show up along the edge of a window or frame, for instance). Honestly, I think these particular 3 dies are SO versatile and beautiful they're worth the price of the entire die set!

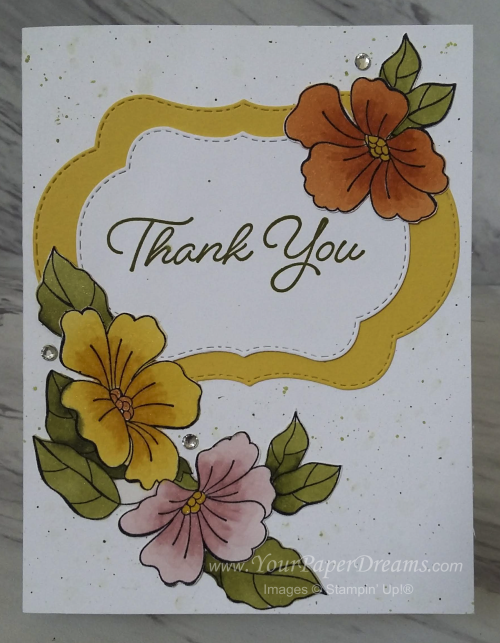
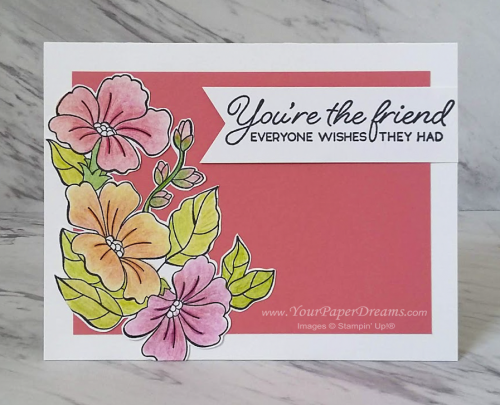
For these flowers, I pulled out my Stampin' Blends and had some fun. Now, I'm admittedly not the most skilled "stampin' blender" around (lots of practice still needed here), but I do enjoy using them. And I particularly love how easily and quickly you can apply color with them. You'll also notice I did a bit of "cut and paste" with the flowers, too. Meaning, I stamped, colored and then "fussy" cut and rearranged flowers and leaves to my liking. I like how splitting the 3 flowers into 2 groupings provides a nice balance to this layout.

To add a touch of additional visual interest I added some splatter to the background of the card base using an aquapainter dipped in ink. (But if you have a really keen eye you'll notice a wayward spatter just above the words. Oops! Apparently, I didn't have those extra pieces set quite far enough away from the splatter action, lol!)

If you don't have this amazing set of stamps, dies and/or watercolor pencils yet, you'll have to hurry, but there are still 2-1/2 days left to grab yours! Jump on over to my online store to check 'em out, and choose 1, 2 or all 3 elements!

"BONUS DAYS" reminder!
 
With every $50 product order you place in August,
you'll get a coupon for $5 off your September order. No limit!
So if your product total is getting close to $50, $100, or $150, etc., then you might want to bump it up.
Also, don't forget that orders of $150 or more (that aren't part of a hosted event) always qualify for Stampin' Rewards, too…
meaning at least $15 in additional free products in your box!


Color your Season – Part 2

My challenge (to myself) continues, as I attempt to create and post 6 card samples made with the "Color your Season" limited-edition products available only during this month of August, and only while supplies last.  (Which, I suppose, defines them as "collectible", right?) 😉


20180806_101514

20180804_100154

Sample #2 is another layout option from my July class. It's stamped with Stazon Jet Black, then colored in with Watercolor Pencils (a mixture of the original set of pencils shown in the Annual Catalog + the additional set available this month), plus Blender Pens. And then fussy-cut.

BTW, I posted some fussy-cutting success tips in our "Paper Dreaming with Lynda" Facebook group this morning. If you're a member, or qualify to be a member, of that FB group (current customer or team member, regular class attendee, or long-time close stampin' friend), be sure to check over there for those tips!

And keep your eyes peeled for Sample #3!

Bonus Days Reminder

Blended Seasons – Limited Time Availability

1
Don't you just love stamp sets with seasonal longevity? And what if such a set also had a matching die set that included a beautiful, unique element that Stampin' Up! has never offered before? And what if you could add 10 new, fresh colors to your watercolor pencils collection? 

Well, that's exactly what August's special limited-edition offer includes!

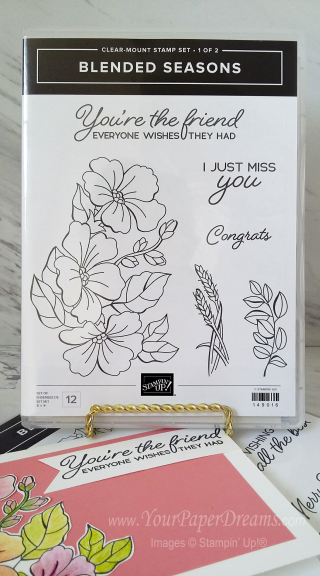
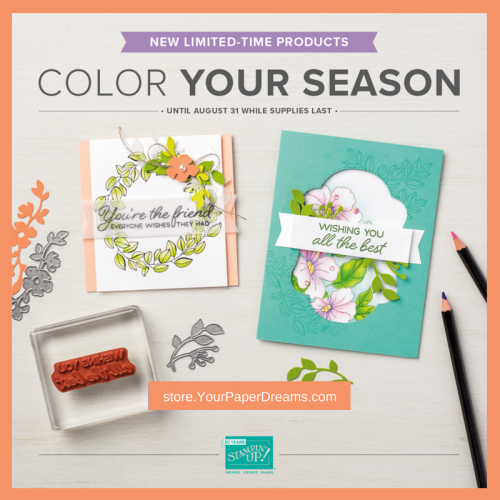
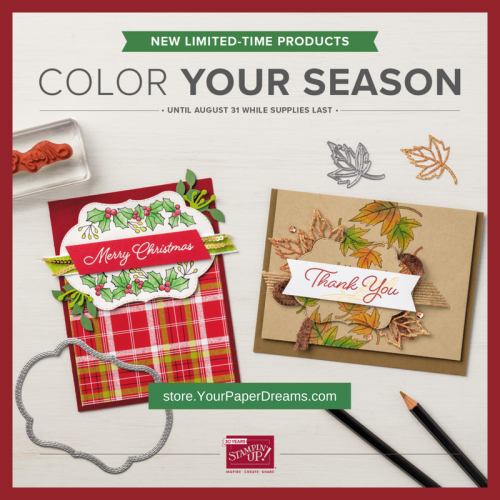
Introducing the "Color Your Season" collection…… available only during August 2018, and only while supplies last!


2

 There are 3 elements to this offering (an exclusive 2-volume stamp set, an exclusive die set, and a set of watercolor pencils in 10 fresh colors). You may choose to get 1, 2 or all 3. The best way to see everything that you can get, and all the details you'll need, is by downloading this 2-page flyer.

Now, you won't want to wait very long to order these because the stamps and dies will only be available during this month of August, and ONLY while supplies last! (And if you've been around Stampin' Up! for very long you KNOW what those 3 little words "while supplies last" can mean, don't you?!?)

While the watercolor pencils make a lovely addition to your 12 stamps and 10 dies, they will eventually appear in a future catalog and you can get them at that time if you MUST wait. (But why not get them now, while you can take advantage of August "Bonus Days", and use them with these stamps and others you may already own?!?)

Oh! And might you be wondering if you can get a discount if you order BOTH the stamps and the dies as a bundle? But, of course you can!  🙂

20180803_180001

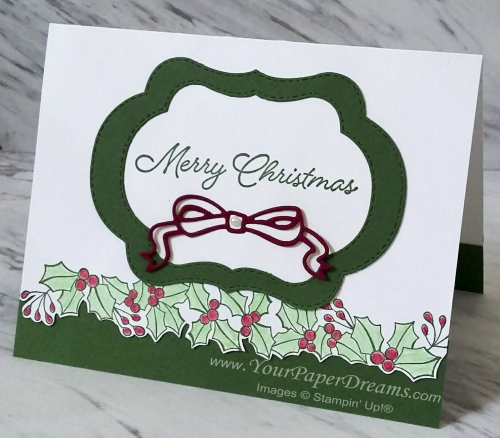
In the meantime, I'll leave you with my very first Christmas card of 2018……  one of the cards from my July card class. It features a couple of each of the 3 products from this collection: stamps, dies, and watercolor pencils.  And did you notice that all 3 of the frame dies have stitching on both inner and outer edges?!? Be still my heart! Even if you used only just *those* frame dies, you'd still get lots and lots of use out of them when combined with other dies and stamps you may already own!

Remember that the earlier in the month you grab your "Color Your Season" products, the more likely you'll be to GET them before they're sold out. Be careful to not wait too long and risk disappointment.

  "BONUS DAYS" reminder!

With every $50 product order you place in August,
you'll get a coupon for $5 off your September order. No limit!
So if your product total is getting close to $50, $100, or $150, etc., then you might want to bump it up.
Also, don't forget that orders of $150 or more (that aren't part of a hosted event) always qualify for Stampin' Rewards, too…
meaning at least $15 in additional free products in your box!

August Wallpaper/Calendar is ready to download

2018 - 8 - August - tinified
As I'm preparing this month's calendar, the thermometer on my balcony is reporting 100-degrees, and a dry, smokey wind is blowing in from the southwest. At 14% humidity, these refreshing beverages look like just the thing to soothe a scratchy throat.
 
My monthly desktop wallpaper background not only offers you a pretty seasonal picture to brighten your computer monitor, but also includes a handy monthly calendar and serves as a cheat sheet reference to websites you may want to know about and visit.  And it's even FREE to download and install, so please don't hesitate to share this page with your friends and family.
 
 
You'll probably want to consult your own computer operating system's installation instructions, but installing the background image on my Windows 10 system takes just 3 quick steps – and less than a minute. It's super-duper easy-peasy!
  1. I download and save the image to my computer - from the link just above that starts with "Click HERE". (NOT from the picture that appears at the top of this post!)  TIP:  To "download" the full-resolution image once it's open (from Google Drive where it's stored), I click on the downward-pointing arrow. THAT is what actually begins the download process to my computer.
  2. Once the file has been downloaded, named and saved to my computer's hard drive, I open it. 
  3. Then I right-click on the image and select "Set as" > "Set as Background"….. then right-click again and select "Set as" > "Set as Lock screen". And poof! That's all there is to it! (For convenience, I install this on both my desktop system as well as my laptop.)
And in case you may have an operating system OTHER than Windows 10, these tips may help with installation:
 
Finally, please keep in mind that the format of my monthly picture is designed for most modern-day 16:9 monitors (a common format for monitors and HD TV's since about 2009), oriented in landscape format. (1920 x 1080 pixels.) If you're working with an older monitor (one that is more square-ish in format), or your monitor is set up in portrait format, the picture will probably not work for you. Sorry 'bout that.

Bonus Days are Back!


Bonus Days Aug 2018
Stampin' Up!'s popular "Bonus Days" promotion will run again from August through September this year, and here's the scoop:

For every $50 product order you place with me during August, you'll receive a $5 coupon (emailed directly to you from Stampin' Up!) to apply towards your September order. To qualify, each $50 in product must be placed on the same order (that is, it's not cumulative and therefore cannot be spread out over multiple smaller orders such as $25 + $15 + $10). But each $50 segment placed on a single order WILL qualify for a coupon. So a $100 product order qualifies for two $5 coupons, and a $150 product order qualifies for 3 coupons, etc. (And of course don't forget that an order of $150 also qualifies for Stampin' Rewards of at least $15 in free product!)

So place your order here, and then be on the lookout for your coupon(s) to arrive in your email shortly after you place your qualifying order. You might have to search around a bit for it, because it might deliver into your promotions box, or sp*m or some other folder/box, depending on your email server and how your settings are configured. But this email will contain a unique code, so be sure to save it in a safe place to use when you place your order NEXT month!

Playing with inlays

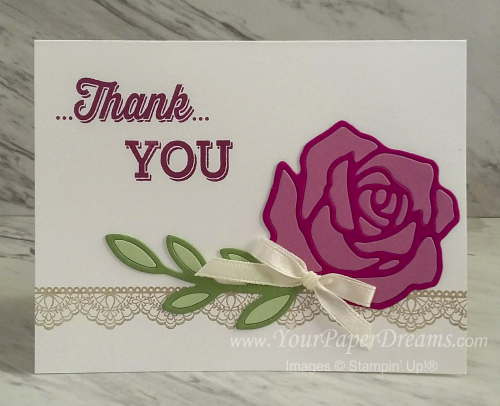
I've been having a lot of fun recently with various forms of paper inlays. That is, embedding one paper image (usually cut with a die) into another piece of paper or cardstock so that the two (or more) elements work together as a unit. There are a number of forms of this technique, but today I'd like to share where multiple colors can be used within a single die-cut image to offer up variations of color.
20180723_072547

The card just above was my first attempt at this, and yes, if you're thinking these dies were recently retired, you would be correct. But these images are a perfect size to practice inlay if you're new to this technique because they're mostly large enough to handle reasonably easily. And I do recommend that if this is your first attempt, try to find an image with pieces large enough to handle. Don't make this harder on yourself than it needs to be, 'cuz it's supposed to be fun!

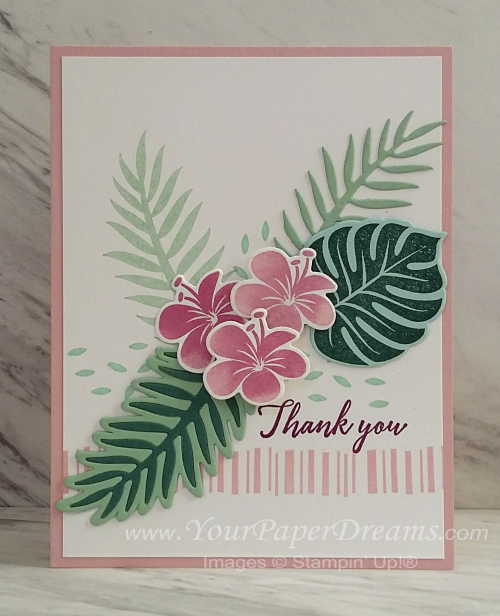
On this next card, I used this inlay technique on the lower left leaf to get the two shades of green…
20180723_072726

And on this next example, I'll walk though the steps and tips for doing the two-toned inlay on the square element at the top…
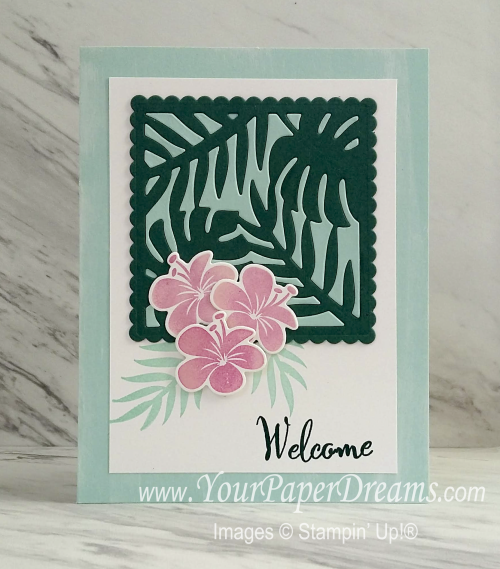
Tropical Chic

The colors of cardstock I have used on this square section are Pool Party and Tranquil Tide, and the dies are from the "Tropical Chic" bundle. I started by cutting out the same die shape from a scrap of each of those colors, and basically followed the same procedure with each one.

First, I set up my usual die-cutting sandwich stack and ran the stack through the Big Shot. But then when it came out of the machine, I didn't rip into the stack in my normal way; instead, I removed the entire stack from the machine and flipped the whole thing upside-down. Now I carefully removed layer by layer until I revealed the underside of the newly die-cut cardstock.
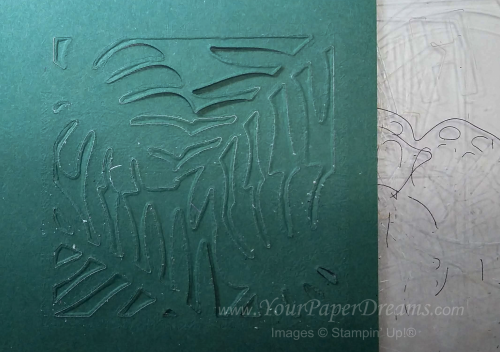
20180723_113437

Next, I laid a sheet of contrasting paper (white, in this case) over what remained of the stack and held it in place tightly while I flipped the remainder of the stack back over, and laid it onto my table. So now I could carefully remove the cutting pad (which was once again on top), and ended up with this:
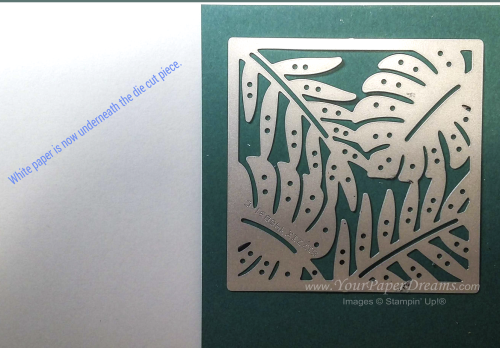
20180723_113540

(Note that going forward I'll be illustrating the process with the contrasting color of cardstock. But I did exactly the same process to each of the two colors I worked with, which ultimately gave me two completed squares – to make two cards.)

Next, using my die brush along with a wooden skewer VERY carefully, I poked out the cut pieces and let them fall into place onto the white paper. Yeah, I did have to make a few adjustments because this step never works exactly perfectly, but the point of this was to try to keep all the little pieces in relative order so I could work with them easily later. These will eventually become pieces in a miniature jig-saw puzzle!
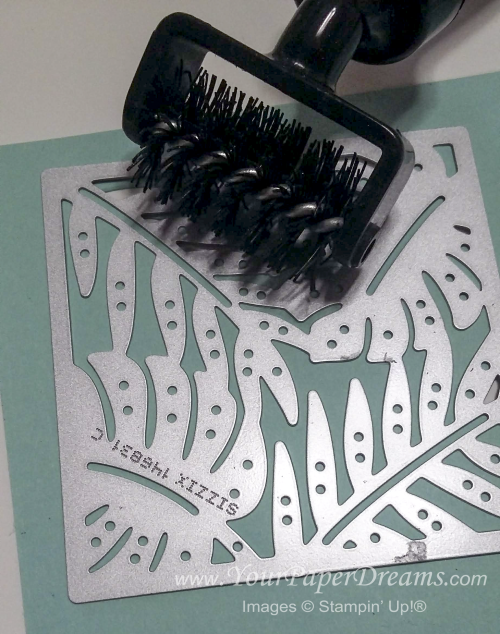
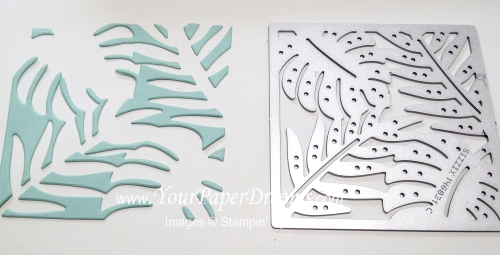
20180722_160642

20180722_161243

Each time I have made one of these embedded examples I have found it helpful to adhere a "base" layer of cardstock underneath the main layer. This ensures the die cut images with all the holes in it doesn't stretch out of shape, and it also prevents drawing attention to any imperfections where one piece might not match up perfectly with another. For this latter reason, I usually make the base layer from the same color of cardstock as the pieces which will eventually be inlaid.

For the 2 examples shown at the top of this article, I die-cut just the outer shape of the image when a die was available, and traced and cut out a base when there was no die of that shape. (That rose does not have a solid shape, so it required tracing and cutting by hand.) Then I carefully glued the detailed shape onto its base. For my third card, I used a couple of square dies to trim up the final image, as well as to create a base layer for underneath. Here's the bottom view of the base layer…. just a little smaller than the finished piece, as you can see:
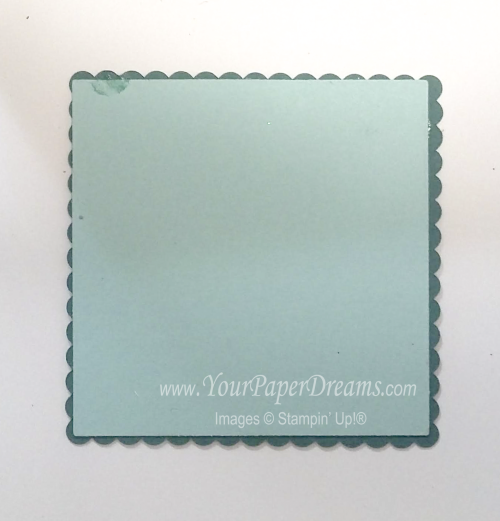
20180722_162712

Now with all the preliminary steps complete, it's time for the fun part….. to start adhering and embedding all the little pieces into their proper spaces. Begin with the piece right-side-up, and insert a teeny-weeny bit of glue onto the base layer in a few open spaces. (Tip:  I like to use a half-and-half mixture of Fine Tip Glue and Multipurpose Liquid Glue, dispensed from a Fine-Tip Glue Pen. I shake this up before using it, but then tap the bottom of the bottle on the table to reduce numbers of potential bubbles. This mixture maintains a little more "body" as it's dispensed, and doesn't take as long to dry as pure Fine Tip Glue does because it's not as liquid.)

Don't put glue in too many places at once; you don't want it drying up on you as you're still inserting pieces into place. A little experience will tell you how far ahead you can work with the glue. And don't forget that when I refer to a "teeny-weeny bit of glue", that's EXACTLY what I mean. ONLY enough glue to anchor the punched-out piece, and NO MORE!

This next picture shows pieces that have already been adhered in place along the left and lower areas. Can you see why it's important to keep the unplaced pieces in relative order for purposes of preserving one's sanity? 
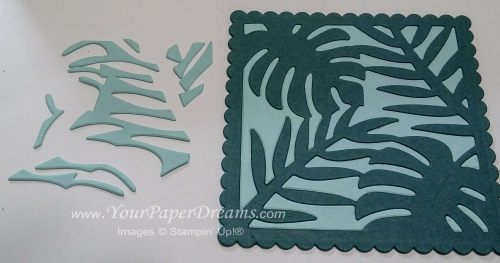
20180722_162015

Most of the time I find I can pick up these pieces with my fingers (and fingernails), but ultimately there are will be a few pieces that are just too small for that. So I have found that if I quickly lick the tip of my pinky finger, touch it lightly to my other hand, and then touch it to the itsy-bitsy little piece, that little challenge piece will usually adhere to my pinky just long enough to set it right down in its appropriate place.  Whew!

And don't forget that if you need reading glasses for close-up work, WEAR THEM! And have adequate working light, and go stare across the street when you're done. It doesn't take my eyes very long to remind me that this kind of minute task isn't very friendly to the eyes.  Ah, but the finished result is certainly worth it!