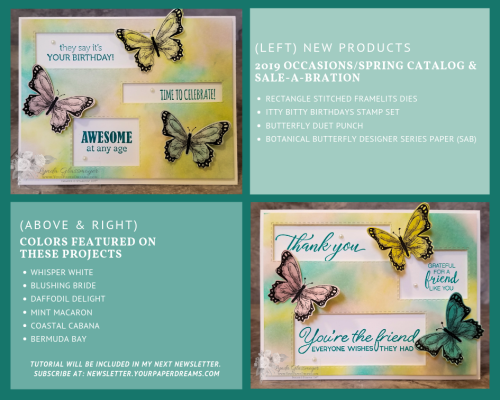
Well, Happy New Year! And along with that, Happy New (Occasions/Spring) Catalog, and Sale-a-Bration 2019!
I'll be offering more about the Occasions/Spring Catalog and Stampin' Up!'s long-standing Sale-a-Bration tradition in the coming days, but today I wanted to share a bit about Stampin' Up!'s new "Cling" stamps, which you may have already noticed in this brand-new catalog.
Yes, we can once again put labels on our temporary-mount red rubber stamps AND expect them to stay in place on the acrylic blocks or Stamparatus! Something I know many of you have been awaiting for a long, long time!
So here's the basic low-down on some of the changes you'll notice in the Occasions/Spring Catalog…
Going forward, *new* stamp designs in red rubber will be known as "Cling" stamps, and the terms "Clear Mount" and "Clear" will be retired (I'm speaking of *new* designs, that is). As you look through the new Occasions catalog you'll notice that stamp designs will generally be available in either the new "Cling" style or "Photopolymer", as we've had for several years now. And with only a few exceptions, Stampin' Up! will be phasing out wood-mount sets… although ongoing sets will continue to be available in the current Annual Catalog until it is replaced this June.
But fear not, those of you classic stampers who favor traditional red rubber images! The red rubber and foam elements aren't going away; only the wood blocks and the concept of "permanent mount" are being retired. Why? Because only a small minority of modern-day stampers are opting to order wood-mounted stamp sets these days – due to the increasing cost of raw materials and the fact that they take more room to store. So these new "Cling" stamps will feature exactly the same red rubber (for the crisp detail you have come to expect and love), but the foam layer appears to me to be a little "whiter", and – most of all – ready to accept the corresponding label, which will actually CLING to your acrylic block (or Stamparatus) until you're ready to remove it! So all the best features of red rubber are being retained, PLUS we'll be able once again to attach the image labels to our stamps! (Hey, now it hasn't really been all THAT bad, has it; the "no-labels" practice of recent years just taught us all how to read backwards when selecting a stamp without its image label attached, lol. Good exercise for our aging brains, right?!?)
So here are some things you'll want to know about the care and feeding of your new cling stamps:
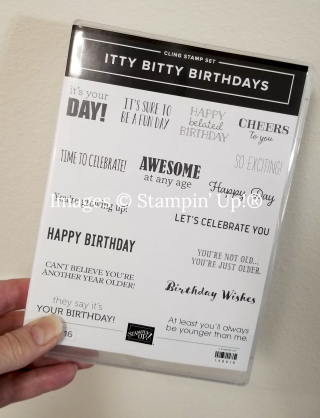
- The case will look very familiar, with the front showing each image, as usual.

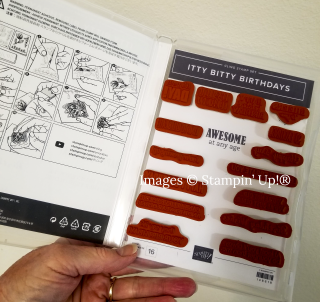
- The inside left will show (in diagram form) how to assemble your new stamps. (Updated diagrams, but if you've used Stampin' Up! stamps in the past, there's really not too much new about assembling them.)
- Be sure you understand how to remove these assembled cling stamps from their case, acrylic block, Stamparatus, etc. Because the labels are SO sticky, it is highly recommended that when it's time to remove the stamp, you carefully get something underneath a corner (such as your fingernail, mini-spatula end of the "Take Your Pick" tool, or perhaps you might want to slip a Post-It Note or piece of painters tape underneath a corner when mounting it to the block in the first place – so you can use that as a peeler-upper handle. Since I have fingernails I've not had any problems carefully and gently peeling the stamp up from its corner and ensuring that the label's coming off with it, but I suspect that could pose a challenge for those who may have shorter nails. So go ahead and think in advance about how you'll handle the "removal" step to avoid any "oops'es" with your stamp.
- In the recent past many of us (myself included) have kept the outer section (scrap piece) of the die-cut rubber, and adhered it to the inside right half of the case as a frame for each stamp, so that we could tell at a glance which stamp(s) might be missing from the set. But it's no longer recommended that we do that because – IF YOU JUST CARELESSLY YANK ON A CLING STAMP TO REMOVE IT FROM EITHER ITS CASE OR AN ACRYLIC BLOCK (OR STAMPARATUS), IT'S ENTIRELY POSSIBLE THAT A LAYER OR TWO OF THE STAMP MAY RIP OFF IN YOUR HAND, WHILE LEAVING THE SUPER-STICKY "CLING" LABEL BEHIND! So don't be a "yanker"; remember to take an extra moment to peel up carefully from a corner!
- Ok, so if we're not going to use the scrap rubber-frame trick anymore, how WILL we keep track of which stamp(s) might be missing from the case before we put it away? Well, here's what I'm doing these days. When I open and assemble a new set of cling stamps, I remove the insert from the front cover and make a copy on my all-in-one printer. Then I replace the original in the front of the case, and trim the copy and insert it back into the right-hand side of the case, so it's visible from inside the case. (It will look just like the front of the case.) And then I attach my assembled stamps right on top of their corresponding images, and now I can tell at a glance which stamp might be missing!

- Finally, to maintain maximum "cling", do keep your stamps (and their labels) clean of dust, pet fur, hair, etc. Rinse with water or Stampin' Mist, or use a mild detergent if necessary. But please, nothing harsh, including no Stazon Cleaner on the labels, if you want to preserve their cling-ability!
Now go pick your favorite designs from the Occasions Catalog, and order 'em up at: store.YourPaperDreams.com


