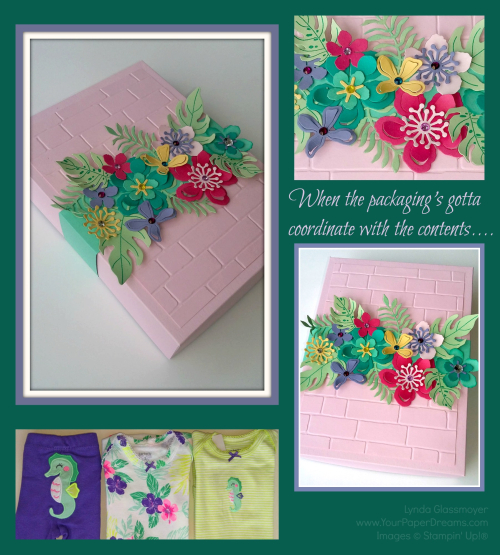
I had occasion recently to wrap a baby gift. Now, this wasn't just some random baby gift, but rather, in celebration of the upcoming arrival of my 2nd granddaughter. So if there's ever a reason to spend a little extra time wrapping something, I figure that that would qualify. I'd picked out this adorable little 3-piece set – 2 onsies and a coordinating pair of pants/leggings. Yes, I know the pant legs will be too long; manufacturers have had DECADES to figure out babies' legs aren't proportioned to the rest of their bodies yet, but for some reason they refuse to adjust accordingly. But I digress. I had this cute little clothing ensemble and it needed to be wrapped. Appropriately.
So the first thing I reached for was cardstock in colors close to those of the clothes. Minus purple, of course; I already knew that wasn't
gonna happen. But I was  surprised to see how tough it was to match the other colors, too! Especially a yellow-green. Came up empty-handed there, too. But eventually I ended up pulling out some scraps of retired In Colors: Strawberry Slush, Pistachio Pudding and Coastal Cabana…… and then added Bermuda Bay, Pink Pirouette, Wisteria Wonder and So Saffron to round out my options.
To determine the size of the box I folded (and refolded) the 3 items until I
could stack them up into a size I could create a box for (using only 8-1/2" x 11" cardstock, 'cuz that's what I had available). Luckily, I determined I could do that with a box 5-1/2" x 7-1/2"….. and 1-1/2" deep. YAY! So I just trimmed a half-inch off the bottom of a full sheet each of Wisteria Wonder (for the box bottom), and Pink Pirouette for the box top. (Leaving me with 8-1/2" x 10-1/2".) Scored 1-1/2" borders all the way around for the bottom, and just the teeniest smidge narrower for the top. (This technique leaves the box top just that itsy-bitsy bit larger so it'll fit over the bottom.)
 After assembling the box I determined that that much surface looked just a little bit "flat", so I added a layer using the Brick Wall embossing folder. Figured that made a decent base to work with, and the fun was about to begin.
Now, I have to confess that I love flowers (DUH! Those of you who know me aren't surprised, are ya?), and after 20 years of working with flowers in the paper and ink world I've figured out it's not likely I'll ever tire of them. And whenever I can combine flowers with DIMENSION, so much the better. So it's really no wonder the Botanical Builder Framelits have become my "go to" faves these days.
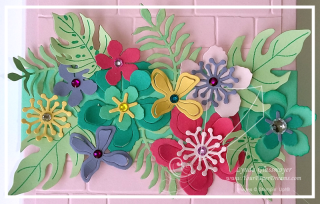
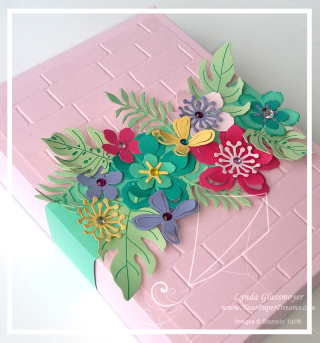
So this is the result. I shaped the flower petals and leaves with a bone folder and also wrapped some elements loosely around a white gel pen. (Ugh! Just realize that's been retired. YIKES! How'd I miss that?!?) All the flowers are glued to a belly band that simply slides off to open the box. I love belly bands on boxes for this purpose; you can get as elaborate as you want with the decoration, and yet nothing has to be untied or otherwise destroyed when it's time to access the box's contents. A perfect packaging solution in my book!
Buy NOW, get a coupon for NEXT month!
Now here's something ELSE really cool! Right now (and through the remainder of July, actually), for every $50 of product you order through me (at one time, that is), you'll get an emailed coupon worth $5 towards product(s) you order NEXT month. (Specifically Aug. 2 – Aug. 31 .) And there are no limits as to how many $5 coupons you can accrue; you'll get one for every $50. So for instance, if you like the Botanical Builder Framelits AND the coordinating Botanical Blooms Stamp Set I've used on this project, well, guess what?! ? Conveniently, they both add up to $50, and BOOM! you've earned a coupon to spend next month! Or choose $150 in product (ordered at one time) and get not only THREE $5 coupons for next month ($15 value, that is), but also $15 in Stampin' Rewards THIS month, too! Get the idea?!?
Here are the products I used on this project; items that are currently available (at time of this writing) will link to my online store:


