Over this past weekend my Paper Dreamers team members and I, along with our customers & friends, participated in World Card Making Day. And I'm thrilled to be able to share today that collectively we made 213 handmade cards! (That got reported to me, that is. It's entirely possible there were even more.) So a big thank you and congratulations to all who were included in that number!
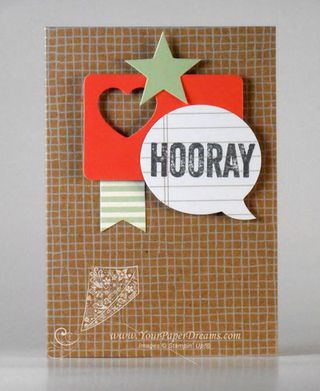
One of the sets of cards I personally worked on included several cards from the "Hip Hip Hooray" designer card kit by Stampin' Up!®. This was my first time exploring that kit and I was pretty impressed! In fact, this is probably one of my all-time *favorite* card kits. These cards are notesize cards, in a heavy-weight Kraft cardstock – printed with either dots or a graph pattern in white. Cards can be oriented in either vertical and horizontal format, and they all have coordinating Kraft envelopes. 3 clear-mount stamps (AND a basic clear block) are included in the kit, along with a Basic Gray ink spot (small ink pad), a full sheet of Stampin' Dimensionals, and several other embellishments. The main design elements come from 5 generous sheets of stampable "Peel & Stick" cardstock-weight stickers.
 Overall, I found the kit pretty easy to put together….. but I figured it could be even EASIER with a few added tips. So here are some of mine:
- Cards come flat, but prescored in the center. Once you've folded the card, crease it well with a bone folder.
- Each card has a tiny "© Stampin' Up!" image printed on it. You'll probably want to locate that and make sure that that side becomes the back of your card.
- Time saver tip: Stamp all the greetings at once – before you begin assembly, and before removing the stickers.Of course you can follow the examples precisely – or adapt according to your own needs. (More "thanks"; less "Hooray", etc.)
- Use your grid paper to ensure the stamp is mounted straight on the block, and then when stamping, place the edge of the clear block exactly parallel to a straight line to ensure a straight stamped image. (See the crooked stamped image at left that reinforced in me the importance of that process….. oops, lol!)
- If you wish to negate the self-adhesive effect of some of the elements that will be popped up on Stampin' Dimensionals, pat on some cornstarch with a cotton ball.
- If you'd like to use just *part* of an image (for instance just "Hooray", but not the rest of the words on that stamp), you can apply blue painters tape to the part of the image you DON'T want to show. Then ink up your stamp, remove the painters tape from the stamp, and then stamp onto your paper.
I think the "Hip Hip Hooray" kit is already a generous value at $19.95, because it makes 20 cards and even includes stamps, ink & acrylic block you can use later. But throughout the remainder of today, you can get it for 25% LESS than that, as it's one of this past week's Weekly Deal items!

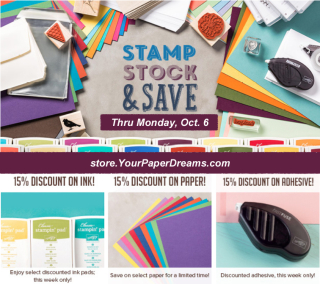
And speaking of "Deals", don't forget that today is the final day of Stampin' Up!'s "Stamp, Stock & Save" special offer, too. If your craft room is in need of replenishing ink pads, cardstock or envelopes, there are only a few hours left to stock up on those basics and save!
The "Hip Hip Hooray" card kit comes with nearly everything you need to complete your 20 cards. But I found these following items helpful to use, too.
Lynda recommends


